Blackjack Basic Strategy Chart Explained (Best Moves for Every Hand)
Blackjack basic strategy tells you the best move for every hand, based on math. It cuts the house edge by removing guesswork. This guide explains how to read a basic strategy chart and use it fast at the table.
You will learn how the chart is built, how to match your hand to the dealer upcard, and what each action means. You will also learn the best plays for hard totals, soft totals, and pairs, plus when to double, split, hit, stand, or surrender.
The advice here assumes standard rules and correct play. Rule changes can shift a few decisions. For a clear breakdown of common rule differences, see online blackjack rules and side bets.
In het kort:
- Use the chart like a grid. Match your hand on the left with the dealer upcard on top, then follow the action.
- Separate hands by type. Hard totals, soft totals, and pairs play by different rules. Do not mix them.
- Double when you have an edge. You win more when your total is strong and the dealer shows a weak upcard.
- Split to improve bad matchups. Split key pairs to turn one weak hand into two better starts.
- Hit to avoid standing on losing totals. If your hand cannot beat the dealer often enough, take a card.
- Stand when you already beat most dealer outcomes. Protect totals that win often against the dealer’s upcard.
- Surrender saves money in the worst spots. If your rules allow it, use it when the chart says so.
- Rules can change a few cells. Dealer hits or stands on soft 17, double rules, and surrender rules matter.
What a Blackjack Basic Strategy Chart Is (and What It Isn’t)
Definition: What the Chart Tells You
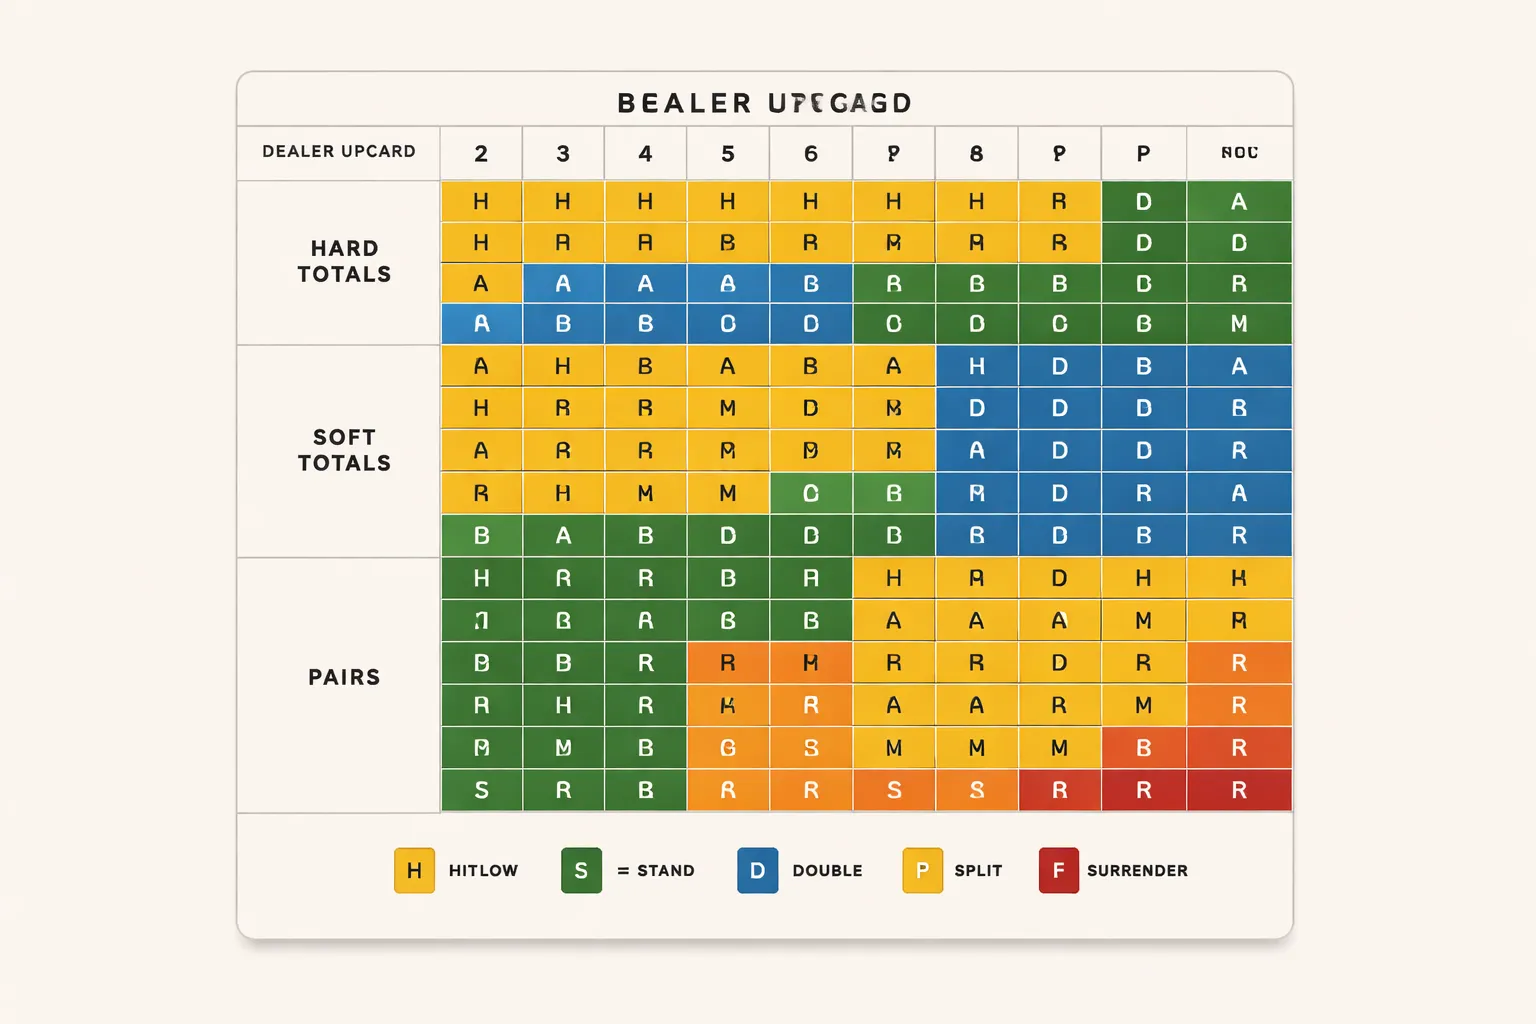
A blackjack basic strategy chart is a decision grid. It tells you the best move for every common player hand against every dealer upcard.
You use it to choose one action:
- Hit, take another card.
- Stand, keep your total.
- Double, double your bet, take one card.
- Split, turn a pair into two hands.
- Surrender, give up the hand for a partial loss, if the game allows it.
The chart assumes you play to maximize expected profit. It does not tell you how to count cards. It does not tell you how much to bet. It does not cover side bets.
What “Optimal” Means in Practice
“Optimal” means the move with the highest expected value for that spot. It does not mean you win the hand.
Expected value is your average result over many hands. Basic strategy targets the best long-run return for the rules in front of you.
Sometimes the optimal play still loses money on average. In those cases, the chart picks the option that loses the least. Surrender decisions often fall into this category.
Why the Chart Uses Dealer Upcards and Hand Types
The dealer’s upcard drives the dealer’s bust rate and finishing totals. Your best move changes because the dealer’s risk changes.
The chart also separates your hands by type because the math changes:
- Hard totals, no Ace counted as 11. These hands break easily, so hit and stand decisions matter most.
- Soft totals, an Ace counted as 11. These hands can take more cards safely, so doubling and hitting rules change.
- Pairs, two same-rank cards. Splitting can raise your expected value by creating two strong starting hands.
When a Chart Stops Being Accurate
A chart is only correct for the rule set it was built for. Change the rules, and some cells change.
- Payouts. 6:5 blackjack shifts many decisions and increases the house edge. Use a chart made for 6:5 if that is what you play.
- Dealer hits or stands on soft 17. H17 and S17 produce different optimal plays.
- Double rules. “Double on any two” plays differently than “double on 9 to 11 only.” Double after split also matters.
- Surrender rules. Late surrender changes specific hard total decisions. No surrender removes that option.
- Number of decks and peek rules. Single deck, double deck, and shoe games can differ. European no-hole-card rules can also change optimal plays.
- Side bets. A basic strategy chart ignores them. Side bets have their own odds and house edge.
If you play online, confirm the game rules and payout first. If the site posts RTP or house edge info, read how it gets calculated in our guide to online casino fairness.
How to Read a Basic Strategy Chart Step by Step
Step 1, Pick the right chart for the rules
Basic strategy charts change with the rules. Use the chart that matches your table.
- Decks: single, double, or 6 to 8 deck shoe.
- Dealer action on soft 17: H17 (hits) or S17 (stands).
- Blackjack payout: 3:2 or 6:5.
- Double rules: double on any two cards, or only on 9 to 11.
- DAS: double after split allowed or not.
- Surrender: late surrender offered or not.
If your rules do not match, the chart will give the wrong plays on key hands.
Step 2, Identify your grid: hard totals, soft totals, or pairs
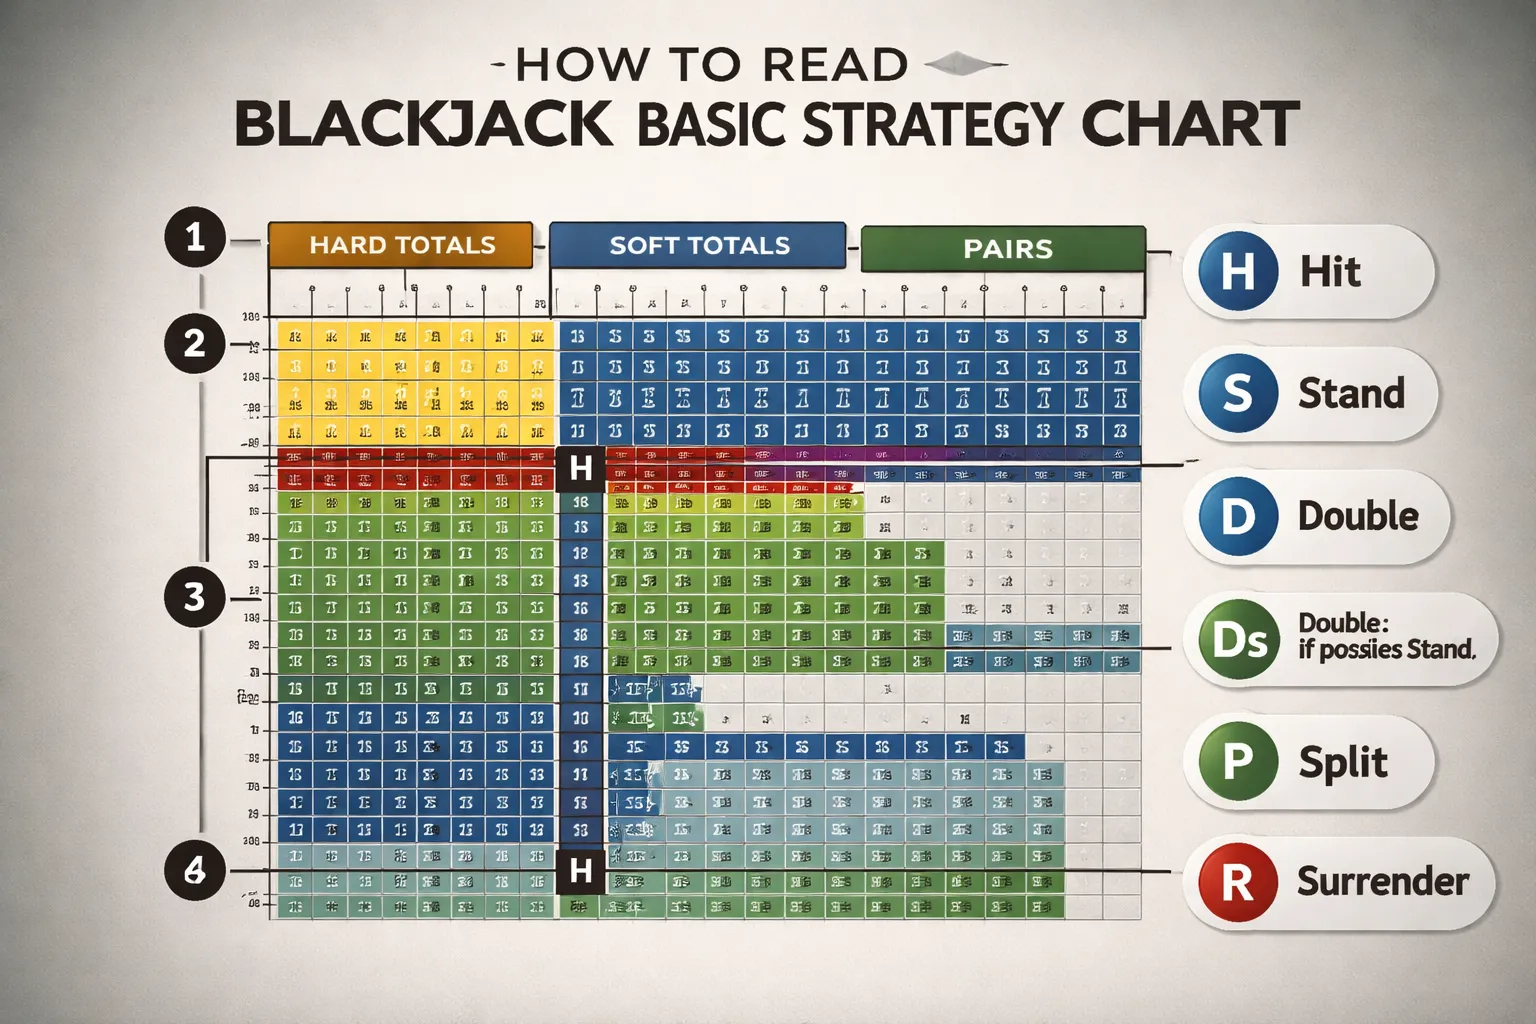
Most charts split decisions into three blocks.
- Hard totals: hands with no ace, or an ace that counts as 1. Example: 10-6, A-8-9.
- Soft totals: hands with an ace counted as 11. Example: A-6, A-7.
- Pairs: two cards of the same rank. Example: 8-8, A-A.
Start in the correct block. A soft hand played as a hard total is a common mistake.
Step 3, Find your total, then the dealer upcard
Read your hand on the left side. Read the dealer upcard across the top. The cell where they meet shows your move.
- If you have a pair, check the pairs block first.
- If you do not split, then use the hard or soft block based on your total.
- If you hit and your hand changes type, switch blocks. Example: A-6 hits a 10, you now have hard 17.
Step 4, Treat all 10-value dealer cards the same
In the dealer column, 10, J, Q, K all mean the same thing. Use the “10” column for any of them.
- Dealer shows J, use the 10 column.
- Dealer shows K, use the 10 column.
Step 5, Apply the action letter
Charts use short codes. Follow the letter in the cell.
- H: Hit.
- S: Stand.
- D: Double if allowed, otherwise hit.
- Ds: Double if allowed, otherwise stand.
- P: Split.
- R: Surrender if allowed, otherwise hit.
- Rs: Surrender if allowed, otherwise stand.
Some charts spell out the fallback. If yours does not, assume the standard fallback above.
Step 6, Use tie-breakers when the rules block your move
When you cannot take the chart’s first choice, use the built-in fallback. Use these in order.
- No surrender: treat R as hit, treat Rs as stand.
- No DAS: after you split, replace any “D” or “Ds” that depends on DAS with the chart’s fallback, usually hit or stand as printed.
- Double not allowed on your hand: follow the fallback in the code, usually hit for D and stand for Ds.
- Split not allowed: play the hand as a hard total.
For a deeper walkthrough with examples, see our guide to using a blackjack basic strategy chart.
Rule Variations That Change the Chart (Choose the Right One)
Deck Count Changes the Best Move
Your chart must match the number of decks. Single deck, double deck, and 6 to 8 deck strategy differs on several close decisions.
- Single deck: More doubles and some extra stands. Small edge swings make marginal hands flip.
- Double deck: Similar to single deck, but some single deck doubles become hits.
- 6 to 8 decks: Fewer doubles and more conservative lines. Many charts default to this format.
If you use the wrong deck chart, you leak EV on the hands you see most, like stiff totals and common doubles.
H17 vs S17 Changes Soft Total Play
Dealer hits soft 17 (H17) makes the game worse for you. It also changes several chart entries.
- H17: You double soft hands less often and you hit more soft totals that you would double in S17.
- S17: You double soft hands more often. Some borderline soft doubles become clear doubles.
Pick the chart that matches the table sign. If the rules board says “Dealer hits soft 17,” you need an H17 chart.
Surrender Rules, Early vs Late
Surrender removes half your bet and ends the hand. The type of surrender matters.
- Early surrender: You can surrender before the dealer checks for blackjack. This rule is rare and powerful.
- Late surrender: You can surrender only after the dealer checks for blackjack. This is what most casinos offer when they offer surrender at all.
If your table has late surrender, use a chart that marks surrender plays. If surrender is not offered, replace every surrender call with the chart’s fallback, usually hit or stand.
Double Rules, Any Two vs 9 to 11 Only, and DAS
Doubling limits change your best move and your long term return.
- Double on any two cards: Standard and best for you. Your chart will include doubles on hands like 10 vs 9 and many soft totals.
- Double only on 9 to 11: Common on low limit games. You must remove doubles on soft hands and on totals like 8.
- Double after split (DAS): Strong player rule. It adds profitable doubles after you split pairs, especially 2s, 3s, 4s, 6s, and 7s.
If DAS is not allowed, your split hands lose key doubles. Use a no-DAS chart or follow the fallback for those “D” spots.
Splitting Limits Change Pair Strategy
Casinos restrict splitting to cut your edge. Your chart must reflect those limits.
- Re-splitting aces: If allowed, you get more chances to build strong hands from A,A. If not allowed, your value drops on ace splits.
- Hitting split aces: Most games do not allow it. If hitting is allowed, ace splits improve and a few close lines change.
- Max split hands: Many tables cap you at 3 or 4 hands total. Fewer hands means less upside on high EV splits.
If splitting is not allowed for a pair, you must play it as a hard total. Your chart must state this, or you will misplay common pairs like 8,8 and 9,9.
Blackjack Payout, 3:2 vs 6:5
3:2 is the standard payout. 6:5 is a major rule penalty. It changes your expected value more than most small chart tweaks.
- 3:2: A blackjack pays 1.5x your bet. Basic strategy charts assume this in most guides.
- 6:5: A blackjack pays 1.2x your bet. Your overall edge drops sharply because you lose value on your strongest hand.
Strategy still follows the same structure, but your edge worsens enough that game selection becomes the priority. If you see 6:5, treat it as a different game and consider leaving for a 3:2 table. For more on table rules and payouts, see our blackjack rules and payouts guide.
Hard Totals Explained (No Ace or Ace Counts as 1)
Hard Totals Explained (No Ace or Ace Counts as 1)
A hard total has no ace, or your ace must count as 1. Your hand cannot “flex” upward without busting. That makes hard totals the most rule driven part of basic strategy.
Hard totals split into two groups.
- Stiff hands (12 to 16), you can bust on one hit.
- Strong hands (17+), you usually stand and let the dealer break.
When to Stand on Stiff Hands (12–16), and Why Dealer 2–6 Matters
Against dealer 2 through 6, you stand more often. Those upcards force the dealer to draw into bust ranges. Your goal is simple, let the dealer take the risky hits.
- Stand on 12 vs 4–6.
- Stand on 13–16 vs 2–6.
- Stand on 17+ vs any upcard.
These stands look weak, but they win because the dealer breaks often enough when showing 2–6. If you hit instead, you give away EV by busting first.
Why You Hit 12–16 Against 7–A (Dealer High Card Advantage)
Against 7 through ace, the dealer has a strong starting card. The dealer finishes with 17–21 more often, and busts less. Standing on 12–16 becomes a slow loss.
- Hit 12 vs 2–3 and vs 7–A.
- Hit 13–16 vs 7–A.
When you hit, you lose sometimes by busting, but you also improve into 17–21 often enough to reduce your loss rate. That is the whole trade.
Doubling Guidelines for Hard Totals (9, 10, 11)
Doubling works when you have an edge and you want more money on the table. Hard 9, 10, and 11 get most of the doubles because one card often turns them into 19–21.
- Hard 9, double vs dealer 3–6. Hit vs 2 and 7–A.
- Hard 10, double vs dealer 2–9. Hit vs 10 and ace.
- Hard 11, double vs dealer 2–10. Versus ace, your play depends on the chart and rules. Many games still double, some hit.
If your table restricts doubles, follow the chart’s fallback. That is usually a hit.
Common Hard Total Mistakes That Cost the Most EV
- Standing on 16 vs 10. You lock in a bad spot. Hitting loses too, but it loses less in most rule sets.
- Hitting 12 vs 4–6. You turn a dealer bust spot into a self bust spot.
- Failing to double 10 vs 9, or 11 vs 10. You miss high value doubles that drive a lot of your long run return.
- Doubling 9 vs 2 or 7+. You double when you do not have the edge.
- Playing “feel” on stiff hands. Treat 12–16 as chart hands, not instinct hands.
If you still feel shaky on lookups, use our guide on how to use a blackjack basic strategy chart and practice with real hands.
Worked Examples (Hard 12 vs 2, Hard 16 vs 10, Hard 11 vs Ace)
Example 1: Hard 12 vs dealer 2. Hit. Dealer 2 is not weak enough to justify standing on 12. If you draw a small card, you reach 13–16 and can still play correctly on later decisions.
Example 2: Hard 16 vs dealer 10. Hit in basic strategy when you do not have surrender. Standing leaves you needing the dealer to bust with a strong upcard. Hitting gives you chances to improve to 17–21, even though you will bust often.
Example 3: Hard 11 vs dealer ace. Check your chart for the rule set. In many games you still double because 11 has strong upside and you only take one card on a double. If your chart says hit, hit. Do not stand.
Soft Totals Explained (Hands with an Ace Counted as 11)
What a Soft Total Is
A soft hand has an ace counted as 11. Example, A,6 is soft 17. The ace can drop to 1 if you would bust.
This flexibility matters. You can take a hit and still survive more often than with a hard hand.
Why Soft Hands Play More Aggressively
Soft totals have lower bust risk. That lets you hit and double more. Your goal is to build strong totals like 19 to 21 while you still have a safety net.
Many soft doubles exist because you get extra value from one more card. You can improve a weak total without the same bust penalty.
Doubling Zones for A,2 Through A,7
Soft doubling rules change mainly with one rule point. Dealer hits soft 17 (H17) makes doubling slightly more valuable. Dealer stands on soft 17 (S17) makes it slightly less valuable. Some charts tighten doubles under S17.
| Your soft hand | Common double spots | Fallback if you cannot double |
|---|---|---|
| Soft 13 (A,2) | Double vs 5,6 | Hit |
| Soft 14 (A,3) | Double vs 5,6 | Hit |
| Soft 15 (A,4) | Double vs 4,5,6 | Hit |
| Soft 16 (A,5) | Double vs 4,5,6 | Hit |
| Soft 17 (A,6) | Double vs 3,4,5,6 | Hit |
| Soft 18 (A,7) | Double vs 3,4,5,6 in many games. Some charts add 2 under H17. | Stand or hit based on dealer upcard |
- Rule sensitivity: Under H17 you will see a few more doubles, especially around soft 18. Under S17 some doubles drop away.
- Double after split: If the table allows it, your chart may push more doubles because you can create more profitable spots after a split.
- Double range logic: You double soft 13 to soft 17 mainly against dealer 3 to 6 because those cards bust more, and your hand can climb fast with one card.
When a Soft Total Turns Hard After a Hit
A soft hand stays soft as long as the ace can still count as 11 without busting.
It turns hard when counting the ace as 11 would bust. Then the ace becomes 1 and you no longer have the safety net.
- A,6 hit and draw a 10. You now have 17. That is hard 17.
- A,7 hit and draw a 9. You now have 17. That is hard 17.
- A,2 hit and draw a 7. You now have soft 20, the ace still counts as 11.
Edge Cases You Must Know
A,7 vs dealer 2. Many charts stand. Some charts double under H17. If you cannot double, you usually stand. This hand sits on the fence, so follow your exact chart.
A,7 vs dealer 9. Hit in most rule sets. Standing loses too often because 18 is not enough against 9. Hitting gives you chances to make 19 to 21, and you rarely bust on one hit.
A,6 vs dealer 2. Hit in many charts. Some charts double vs 2 under H17. If your chart does not show a double, take the hit. Soft 17 needs improvement.
A,8 vs dealer 6. Stand. You already have 19. Doubling risks turning a strong hand into a mediocre hard total. Keep the 19 and let the dealer break.
For a tighter house edge, pair basic strategy with favorable rules and payouts. See low house edge casino games for comparisons.
Pairs and Splitting Strategy Explained
Core split logic, why pairs play differently
A pair gives you a choice. Keep one hand with a fixed total, or split into two hands and raise your long run value.
You split when two new starting hands beat the value of playing the pair as a hard total. You do not split when the pair already forms a strong total, or when the dealer upcard makes two weak hands worse than one playable hand.
Most pair decisions hinge on three things, your pair rank, the dealer upcard, and whether you can double after split (DAS).
Always splits and never splits, and why
- Always split A,A. Aces start the best hands. One ace plus any 10 value card makes blackjack in some rule sets, and it always builds strong totals. Keeping A,A as 12 is a low value hand.
- Always split 8,8. 16 is the worst hard total to play. Splitting turns one bad hand into two chances to make 18 or better, and it reduces bust risk.
- Never split 10,10. You already have 20. Splitting throws away equity to chase two smaller hands that will lose more often than a made 20.
- Never split 5,5. 10 is a strong doubling hand. Split 5s turns a high EV double into two weak hands that often become stiff totals.
Situational pairs, when you do not split 2s, 3s, 4s, 6s, 7s, 9s
Small pairs gain value when the dealer shows weakness, and lose value when the dealer shows 7 through A. When you skip the split, you usually hit the hard total and play it like any other hand.
| Pair | Typical split window | Do not split when | Fallback play |
|---|---|---|---|
| 2,2 and 3,3 | Split vs 2 to 7 | Dealer shows 8, 9, 10, A | Hit 4 or 6 until you reach a safe total |
| 4,4 | Split vs 5 and 6 with DAS | No DAS, or dealer shows 2 to 4, 7 to A | Hit hard 8 |
| 6,6 | Split vs 2 to 6 | Dealer shows 7 to A | Hit hard 12 in most cases |
| 7,7 | Split vs 2 to 7 | Dealer shows 8, 9, 10, A | Hit hard 14 |
| 9,9 | Split vs 2 to 6, 8, 9 | Dealer shows 7, 10, A | Stand on 18 |
How DAS changes small pair value
DAS lets you double after you split, which increases payoff when a split hand improves to a strong double total like 9, 10, or 11.
- It boosts 2,2 and 3,3 splits. After a split you often draw a small card that creates 9 to 11, then you can double.
- It makes 4,4 split viable. Without DAS, splitting 4s creates many weak hands that you can only hit. With DAS, a 4 plus 5 or 6 creates 9 or 10, and you can double when the dealer shows 5 or 6.
- It slightly improves 6,6 and 7,7 splits. More post split doubles means more value when the dealer is vulnerable.
Split aces rules, and why they are special
Casinos restrict split aces because they are too strong.
- One card only. After you split aces, you usually receive one card per ace, then you must stand.
- No resplit, or limited resplits. Some tables allow one resplit. Many do not.
- Blackjack may not pay 3 to 2. A 10 value card on a split ace often counts as 21, not blackjack. That lowers payout.
You still split A,A because starting each hand with an ace has high value even with restrictions. Playing A,A as 12 forces you into low EV hit decisions.
Examples you will see at the table
- 9,9 vs dealer 7. Stand. You have 18. Splitting creates two 9 starting hands that perform worse against a dealer 7 than an 18 does.
- 8,8 vs dealer 10. Split. Hard 16 bleeds money against a 10. Two 8 starting hands give you more paths to 18 to 21, and you avoid the worst stiff total.
- 4,4 vs dealer 5. With DAS, split. Without DAS, hit. DAS turns many post split results into profitable doubles, without it you pay extra to create two weak hands.
Pair decisions change when rules change. Confirm the table rules and the posted strategy, and keep your expectations realistic by understanding how house edge works in the first place, see online casino fairness and house edge basics.
Surrender, Insurance, and Other Chart Decisions People Misplay
Late surrender, what it is and when to use it
Late surrender lets you fold after the dealer checks for blackjack. You lose half your bet and end the hand.
Use it when your expected loss from playing the hand is worse than 0.5 units. That is the whole point. It is a loss control move, not a comeback move.
These are the classic late surrender spots in most 4 to 8 deck games.
- Hard 16 vs 9, 10, A, surrender.
- Hard 15 vs 10, surrender.
Common misplays.
- You surrender 15 vs 9. Basic strategy usually hits in shoe games.
- You surrender soft hands. Soft totals almost never surrender because you have draw flexibility.
- You surrender after a hit. Surrender is a first decision option only.
Rule notes that change these calls.
- Single and double deck often change 15 and 16 decisions.
- If the casino offers early surrender, the chart changes a lot. Most casinos do not offer it.
- If the table says “no surrender”, ignore surrender cells and play the next best action.
Insurance, why it is usually a bad bet
Insurance is a side bet offered when the dealer shows an Ace. You can bet up to half your original wager. You win 2 to 1 if the dealer has a ten value card in the hole.
For you to break even, the dealer must have blackjack more than 1 out of 3 times. That means the hole card must be a ten value card more than 33.33% of the time.
In a fresh deck, ten value cards make up 16 of 52 cards. That is 30.77%. In shoes it stays near that number. That gap is why insurance loses money for basic strategy players.
When insurance is rational.
- You count cards and you know the remaining deck is rich in tens.
- Your true count crosses the game specific insurance index. Many players use a common shortcut, take insurance around true count +3 in typical shoe games, then refine by rules and deck count.
Common misplays.
- You buy insurance because you have a big bet out. That does not change the math.
- You buy insurance because you have a weak hand. Insurance ignores your hand. It only depends on the dealer’s hole card.
- You treat insurance as protection. It is a side bet with its own edge.
Even money on blackjack, what is actually happening
Even money shows up when you have blackjack and the dealer shows an Ace. The dealer offers to pay you 1 to 1 right now.
This is just insurance in disguise.
- You have blackjack. Your main bet is already a strong position.
- Taking even money means you place insurance for half your bet.
- If the dealer has blackjack, the insurance win covers the push on your main bet, so you lock a 1 to 1 payout.
- If the dealer does not have blackjack, you lose the insurance and get paid 3 to 2 on your main bet, which nets to the same as taking even money only when insurance was a good bet in the first place.
Basic strategy takeaway.
- If you do not take insurance, do not take even money.
- If you do take insurance based on a count, even money can make sense for the same reason.
Dealer Ace or 10 checks, and how it affects your chart
Many tables run a “peek” or “hole card” check when the dealer shows an Ace or a ten value card. The dealer checks for blackjack before you act.
That matters because it removes a common trap. Without a check, you can double or split, then lose extra money when the dealer flips blackjack.
How to handle it in real play.
- If the dealer checks and does not have blackjack, you can follow your chart normally. Your doubles and splits are now protected from an instant blackjack loss.
- If the dealer does not check, some charts change. You may see “no hole card” strategy with fewer doubles and more conservative splits, because your added money is exposed.
- When the dealer shows an Ace, resolve the insurance offer first. Then play your hand if the dealer does not have blackjack.
Common misplays.
- You change strategy after the dealer “checks and nods”. Do not. The check only confirms no blackjack. It does not change the dealer up card or your correct basic strategy action.
- You assume every online game uses the same procedure. Live dealer games often use a peek, RNG games may resolve blackjack instantly. Read the table rules before you trust any chart.
Text-Based Basic Strategy (Quick Reference Without a Grid)
Hard totals, quick rules you can memorize first
Use these rules for hands with no ace, or an ace counted as 1.
- Always hit 8 or less.
- 9: Double vs dealer 3 to 6. Otherwise hit.
- 10: Double vs dealer 2 to 9. Otherwise hit.
- 11: Double vs dealer 2 to 10. Hit vs ace.
- 12: Stand vs dealer 4 to 6. Otherwise hit.
- 13 to 16: Stand vs dealer 2 to 6. Otherwise hit.
- 17 or more: Always stand.
If your table offers surrender, add this layer.
- Surrender 16 vs 9, 10, ace. If you cannot surrender, hit.
- Surrender 15 vs 10. If you cannot surrender, hit.
Soft totals, quick rules for A,2 through A,9
Use these rules for hands with an ace counted as 11.
- A,2 and A,3 (soft 13 to 14): Double vs dealer 5 to 6. Otherwise hit.
- A,4 and A,5 (soft 15 to 16): Double vs dealer 4 to 6. Otherwise hit.
- A,6 (soft 17): Double vs dealer 3 to 6. Otherwise hit.
- A,7 (soft 18): Stand vs dealer 2, 7, 8. Double vs 3 to 6. Hit vs 9, 10, ace.
- A,8 (soft 19): Stand. Double vs dealer 6 if your rules allow it. Otherwise stand.
- A,9 (soft 20): Always stand.
If double after split is not allowed, you will double less often with soft hands. The hit or stand parts stay the same.
Pair splitting, quick rules and the exceptions that matter
- Always split A,A and 8,8.
- Never split 10,10 and 5,5. Play 10,10 as 20. Play 5,5 as a hard 10 and double vs 2 to 9.
- 2,2 and 3,3: Split vs dealer 2 to 7. Otherwise hit.
- 4,4: Split vs dealer 5 to 6. Otherwise hit.
- 6,6: Split vs dealer 2 to 6. Otherwise hit.
- 7,7: Split vs dealer 2 to 7. Otherwise hit.
- 9,9: Split vs dealer 2 to 6, 8, 9. Stand vs 7, 10, ace.
Big exception you must remember.
- 8,8 vs 10 or ace: Surrender beats splitting when surrender is available. If you cannot surrender, split.
Rule check you should do once per table.
- Resplitting aces and hitting split aces: Most tables do not let you hit split aces. Some do not let you resplit them. These rules change your edge, not the core logic of the decisions above.
A minimalist travel version for noisy casino floors
- Hard hands: Stand on 17+. Hit 8 or less. For 13 to 16, stand vs 2 to 6, hit vs 7 to ace. For 12, stand vs 4 to 6, otherwise hit.
- Double: 9 vs 3 to 6. 10 vs 2 to 9. 11 vs 2 to 10. Soft A,6 vs 3 to 6. Soft A,7 double vs 3 to 6.
- Soft hands: A,8 and A,9 stand. A,7 follow the three-way rule, stand vs 2,7,8, double vs 3 to 6, hit vs 9 to ace. All other soft totals, double in the listed window, otherwise hit.
- Splits: Always split A,A and 8,8. Never split 10,10 and 5,5. Split 9,9 except vs 7, 10, ace.
- Surrender if offered: 16 vs 9, 10, ace. 15 vs 10.
If you want another fast edge check across casino games, read our guide to online roulette rules, bets, and payouts.
How to Memorize the Blackjack Basic Strategy Chart Faster
Chunk the Chart, One Hand Family Per Session
You will learn faster if you stop treating the chart like one big grid.
- Session A: Hard totals. Start with 8 to 17 since these drive most decisions.
- Session B: Soft totals. Learn A,2 through A,9 as “double windows,” then default to hit or stand.
- Session C: Pairs. Lock in the few rules that matter most, then learn the exceptions.
- Session D: Surrender. Learn the small list, then move on.
Keep each session narrow. Your goal is fast recall, not explanation.
Use Patterns That Cut Memorization in Half
Basic strategy collapses into two dealer zones.
- Dealer 2 to 6. Dealer is more likely to bust, you play stronger. Stand more, double more, split more.
- Dealer 7 to Ace. Dealer is more likely to make a hand, you play safer. Hit more, double less, split less.
Then memorize the high value anchors.
- Hard 17+ stands. No exceptions in standard charts.
- Hard 11 doubles. Against almost everything, depending on rules.
- Hard 10 doubles vs 2 to 9. Skip 10 and Ace.
- Hard 12 stands vs 4 to 6. Otherwise hit.
- Hard 13 to 16 stand vs 2 to 6. Otherwise hit, with surrender exceptions if offered.
- Always split A,A and 8,8. Never split 10,10 and 5,5.
Drills That Build Reflexes
- Flashcards. Front: your hand plus dealer upcard. Back: the move. Do 30 to 60 cards per day.
- Dealer upcard quizzes. Pick one dealer card, like 6. Run through every player hand and say the correct move.
- Timed practice. Set a 60 second timer. Answer as many random hands as you can. Track your score.
Keep the pace high. You want instant decisions, not slow chart reading.
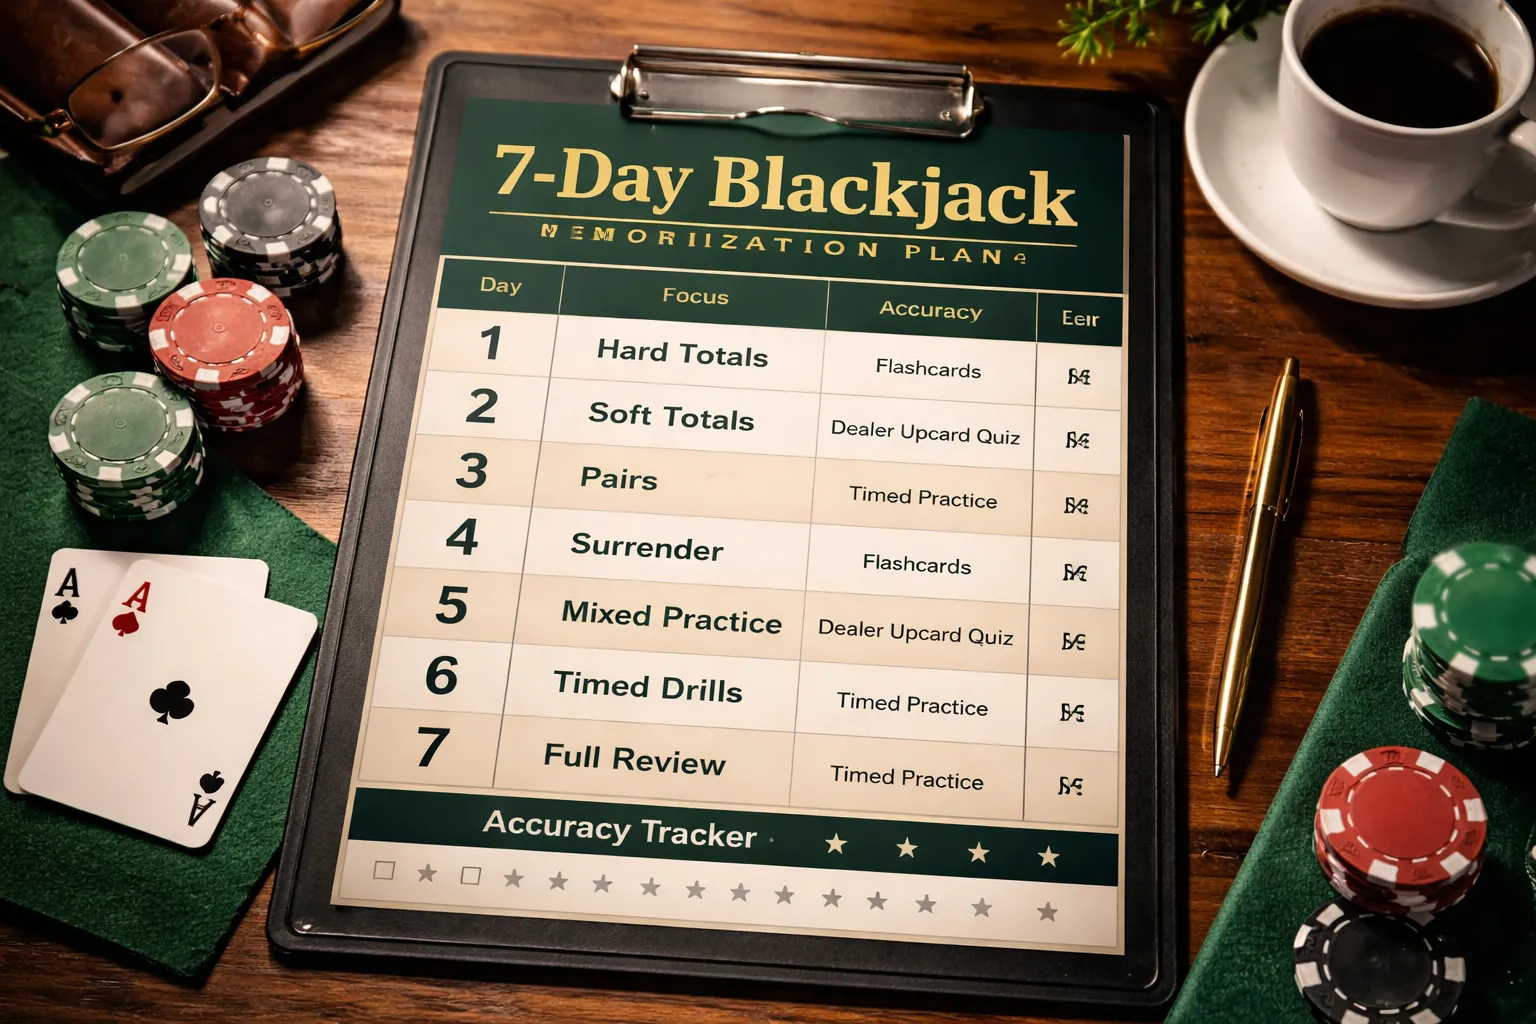
15 Minutes a Day for 7 Days
- Day 1. Hard totals 13 to 17 only. Drill by dealer zone, 2 to 6 then 7 to Ace.
- Day 2. Hard totals 8 to 12. Focus on 12 vs 4 to 6, 10 vs 2 to 9, 11 doubles.
- Day 3. Soft totals A,2 to A,9. Learn the double windows, then default to hit or stand.
- Day 4. Pairs. Lock in A,A and 8,8, then 9,9 exceptions, then the rest.
- Day 5. Surrender rules if your game offers it, then mix in all hard totals.
- Day 6. Full mixed deck drill, timed. Spend the last 5 minutes on your top mistakes.
- Day 7. Simulated play. Deal hands or use an app. No chart. Log every error.
If you play live dealer tables, use the same routine before a session. It translates well to real pace and real pressure. Learn more in our live casino guide.
Verify You Are Improving
- Track accuracy. Write down total hands answered and correct answers each day. Aim for 90 percent, then 95 percent.
- Log errors by category. Hard totals, soft totals, pairs, surrender. Fix the worst category first.
- Log errors by dealer zone. 2 to 6 mistakes often mean you miss doubles and stands. 7 to Ace mistakes often mean you stand too much.
- Retest the same set. Re-run yesterday’s missed hands until you hit perfect recall.
Common Mistakes When Using a Basic Strategy Chart (and Fixes)
Misclassifying Soft vs Hard Totals in Live Play
This is the most common chart error. It happens fast, mid-hand, after a hit.
- Soft total: You can count an Ace as 11 without busting. Example: A-6 is soft 17.
- Hard total: Your Ace must count as 1, or you have no Ace. Example: A-6-10 is hard 17.
Fix it with one rule. If your hand contains an Ace, try to count it as 11. If that total goes over 21, your hand is hard.
Common fail point. You start with a soft hand, take a card, then keep playing it like it is still soft. Re-check after every hit.
Forgetting Table Rules and Using the Wrong Chart
A basic strategy chart is rule-specific. If your chart does not match the table, you make correct-looking moves that lose value.
- 6:5 blackjack payout: Your edge gets worse even with perfect play. Many borderline doubles and some aggressive lines lose value. Best fix is simple. Do not play 6:5.
- H17 vs S17: If the dealer hits soft 17, you double more and stand less in some soft total spots. Using an S17 chart on an H17 table leaks EV.
- No DAS: If you cannot double after splitting, some splits drop in value, especially small pairs. Using a DAS chart pushes you into splits that no longer pay.
- Surrender rules: Early vs late surrender changes a few key hands. If surrender is not offered, any “R” on your chart must become the correct hit or stand line.
Fix it before you sit down. Confirm payout, H17 or S17, number of decks, double rules, DAS, and surrender. Then use the matching chart. If you play online, check the game rules once, then save the right chart for that specific table. Use one setup and stick with it.
If you need a quick rules checklist, use your house edge mindset. Small rule changes stack, the same way small odds differences matter in games like European vs American roulette odds.
Overusing Stand on 16 vs 10 Because You Fear Busting
Many players freeze on hard 16 vs dealer 10. They stand to avoid busting. That fear costs money.
- If surrender exists: Surrender is often the best move on 16 vs 10. Take it when your chart says so.
- If surrender does not exist: You usually hit 16 vs 10. You will bust a lot. That is still the best long-run play.
Fix it with a simple standard. Treat 16 vs 10 as a “chart hand,” not a “feel hand.” Decide before the session. If your chart says hit, you hit. If it says surrender, you surrender. You do not negotiate with the bust risk.
Splitting 10s for Excitement
Splitting 10s feels aggressive. It is usually a losing deviation.
Two cards worth 10 already give you 20. That is one of the strongest totals in blackjack. You win often by standing and letting the dealer fail to beat 20.
- You turn one strong hand into two weaker hands.
- You increase variance and expose more money to the house edge.
- You give up a high win rate for extra action.
Fix it with a hard rule. Never split 10s unless you follow a specific count-based system and you know the index for your exact rules. Basic strategy players should always stand.
Letting Other Players Influence Your Decisions (Myths vs Math)
Table talk creates bad play. Players blame you for “taking the dealer’s bust card.” That is not how blackjack works.
- Myth: Your hit “steals” the dealer’s next card.
- Math: Cards come from a mixed shoe. Your decision changes your result. It does not create a consistent advantage or disadvantage for others.
- Myth: You should “play for the table.”
- Math: Your best move is the one with the highest expected value for your hand against the dealer upcard, given the rules.
Fix it with a script. “I play basic strategy.” Then stop explaining. Use the chart. Log your own mistakes. Do not borrow someone else’s superstition.
What Basic Strategy Can and Can’t Do (House Edge, Variance, Expectations)
Basic strategy cuts the house edge, it does not beat the game
Basic strategy gives you the best expected value for every decision. It does not change the fact that blackjack is a negative expectation game for non-counters.
With bad play, your house edge can sit around 2 percent to 6 percent or worse, depending on mistakes and rules.
With correct basic strategy, many common games land around 0.3 percent to 1.0 percent house edge. Rules move that number. So do payouts, decks, and surrender.
- Best common rule sets: Often near 0.3 percent to 0.6 percent with solid rules and correct play.
- Average casino rules: Often near 0.5 percent to 0.9 percent.
- Bad rules: 1.0 percent to 2.0 percent, sometimes higher, even with perfect basic strategy.
Two rule switches matter fast.
- 3:2 blackjack vs 6:5 blackjack: 6:5 adds about 1.4 percent to the house edge. Basic strategy cannot fix that.
- Surrender: Late surrender often cuts house edge by about 0.07 percent to 0.10 percent, depending on rules and decks.
If you want the exact edge for your table, start with the rules. Then use correct strategy for that rule set. Use the right chart.
Variance explains why your sessions lie to you
You can play perfect basic strategy and lose for hours. You can play poorly and win all night. That is variance.
Blackjack results swing because outcomes cluster. You can catch streaks. The dealer can run hot. Your doubles and splits can fail in a row.
Short sessions measure luck. They do not measure correctness.
- Winning does not prove you played well.
- Losing does not prove you played wrong.
- Your only controllable input is decision quality and bet size.
If you want feedback, track errors, not outcomes. Mark every time you deviated from the chart. That number matters.
Bankroll and bet sizing for casual players
If you do not count cards, you should not ramp your bets. Flat bet.
Pick a stake you can lose without stress. Then protect it with simple limits.
- Flat bet: Use one unit most hands. Avoid chasing losses.
- Unit size: Keep one unit at 1 percent to 2 percent of what you brought for the session.
- Stop-loss: Set a hard number, often 20 to 40 units. Quit when you hit it.
- Stop-win: Set a cash-out point if you want one, then leave. Do not press because you feel safe.
Expect downswings. They come even with perfect play. If you hate swings, you want lower volatility games. Slots make this worse, not better. See slot volatility if you need a clear model for how swings feel in practice.
When basic strategy is enough, and when people consider card counting
Basic strategy is enough when your goal is to play efficiently and lose the least per hour. That is most players.
It is also enough when the rules are good and you want a clean, low-drama approach. You memorize the chart. You execute.
People consider card counting when they want positive expectation. Counting tries to shift expected value by changing bet size and sometimes plays based on the remaining deck.
- Basic strategy: Best play with no deck information. You still face a house edge.
- Counting: Adds deck information. Requires bankroll, discipline, heat management, and strong game selection.
If the table pays 6:5, offers bad penetration, or uses continuous shuffling, counting gets weaker. Basic strategy still matters, but the game stays a grind.
Start here. Get error-free first. Then decide if you want the work and risk of counting. Most players do not.
Responsible Gambling Notes for Strategy Players
Setting loss limits and time limits before you sit down
Basic strategy lowers the house edge, it does not remove it. You can still lose. Plan for that before you play.
- Set a stop-loss in dollars. Pick a number you can afford to lose, then stop when you hit it.
- Set a win cap in dollars. Lock a profit target, then leave. Long sessions give variance more time.
- Set a time limit. Use a timer. When it ends, you cash out and walk.
- Separate blackjack money from life money. Use a fixed session bankroll. Do not reload from your debit card.
- Size bets to the limits. A common rule is 1 to 2 percent of your session bankroll per hand. Bigger bets spike risk fast.
Recognizing tilt and decision fatigue (and when to walk away)
Strategy only works when you follow it. Tilt and fatigue cause errors. Errors raise the house edge.
- Tilt signs. You feel angry, rushed, or stuck on getting even. You start changing bets to chase losses.
- Fatigue signs. You stop checking the chart, misread totals, or forget the dealer upcard.
- Walk-away rules. Leave after two or three clear mistakes, any urge to chase, or any argument at the table.
- Do a reset. Stand up, get water, and take a real break. If you still feel off, end the session.
If you need a refresher to reduce chart errors, use this basic strategy chart walkthrough before your next session.
Separating skill-based decisions from gambling outcomes
Judge yourself on decisions, not results. A correct play can lose. A bad play can win.
- Your controllables. Game rules, bet size, session length, and chart accuracy.
- Your non-controllables. Short-term streaks, dealer runs, and card order.
- Track decision quality. Write down how many hands you played and how many chart errors you made. Aim for zero errors.
- Do not rewrite strategy after a bad swing. Variance does not mean the chart failed.
- Quit while you still play well. The best time to stop is when you can still follow the chart without effort.
FAQ
What is a blackjack basic strategy chart?
A basic strategy chart shows the best play for every player hand against every dealer upcard. It uses math to minimize the house edge. You follow it hand by hand. It does not predict short-term results.
How do I read the chart fast?
Find your hand type first, hard total, soft total, or pair. Then match the dealer upcard across the top. Play the action in the cell. Use the correct chart for dealer hits or stands on soft 17.
What does hard vs soft mean?
A hard hand has no ace, or an ace that must count as 1 to avoid busting. A soft hand has an ace counting as 11 without busting. Soft hands let you hit more because you can drop the ace to 1.
Why does basic strategy sometimes lose?
Basic strategy reduces expected losses. It does not remove variance. You can still lose many hands in a row. Judge your play by chart accuracy, not by the last session. Track errors, then fix them.
Does the chart change with table rules?
Yes. Key rules change optimal moves, dealer hits soft 17, surrender, double after split, and number of decks. Use a chart made for your exact game. A wrong chart adds more edge than most players expect.
Do I need to memorize the chart?
Memorize the big blocks first, stand on hard 17+, hit hard 8 or less, always split aces and 8s. Then learn doubles and soft totals. Drill 10 minutes per day. Aim for zero errors.
When should I surrender?
Use surrender only if your table offers it. Common late surrender spots include 16 vs 9, 10, A and 15 vs 10. Do not guess. If you surrender wrong, you give away value fast.
Should I ever take insurance?
No, not with basic strategy. Insurance is a side bet with a high house edge for non-counters. You should decline it every time. Focus on the main hand decision instead.
What is the best app or tool to practice?
Use a basic strategy trainer that forces timed decisions and tracks mistakes by hand type. Practice the rules you actually play. Stop when accuracy drops. If you want other casino math basics, read this guide on RNG and house edge.
Conclusion
Basic strategy gives you the best move for every hand under a fixed rule set. It does not predict the next card. It cuts the house edge to its minimum for that game.
Your edge comes from clean execution. Use the right chart for the table rules. Then make the same correct decision every time.
- Match the chart to key rules, dealer hits or stands on soft 17, surrender, double after split, number of decks.
- Lock in the big swing spots first, 16 vs 10, 15 vs 10, soft 18, pair splits.
- Never take insurance. Treat it as a separate bet with a bad price.
- Practice with a trainer until you can play at speed with high accuracy.
Final tip. Pick one game you actually play, save that exact chart, and drill 10 minutes a day until errors disappear. If you need a rules refresher, use this online blackjack guide to confirm the table settings before you practice.
-
Online Casino Fairness Explained: RNG, RTP, House Edge & Provably Fair
8 months ago -
Slot RTP Explained: What RTP Means and How to Use It
8 months ago -
How to Play Online Slots: Rules, Features & Beginner Tips
8 months ago -
How Slot Jackpots Work: Progressive Jackpots Explained
8 months ago -
How to Play Online Blackjack: Rules, Payouts & Quick Start Guide
8 months ago
-
- Hard Totals Explained (No Ace or Ace Counts as 1)
- When to Stand on Stiff Hands (12–16), and Why Dealer 2–6 Matters
- Why You Hit 12–16 Against 7–A (Dealer High Card Advantage)
- Doubling Guidelines for Hard Totals (9, 10, 11)
- Common Hard Total Mistakes That Cost the Most EV
- Worked Examples (Hard 12 vs 2, Hard 16 vs 10, Hard 11 vs Ace)
-
- What is a blackjack basic strategy chart?
- How do I read the chart fast?
- What does hard vs soft mean?
- Why does basic strategy sometimes lose?
- Does the chart change with table rules?
- Do I need to memorize the chart?
- When should I surrender?
- Should I ever take insurance?
- What is the best app or tool to practice?
-
-
- Hard Totals Explained (No Ace or Ace Counts as 1)
- When to Stand on Stiff Hands (12–16), and Why Dealer 2–6 Matters
- Why You Hit 12–16 Against 7–A (Dealer High Card Advantage)
- Doubling Guidelines for Hard Totals (9, 10, 11)
- Common Hard Total Mistakes That Cost the Most EV
- Worked Examples (Hard 12 vs 2, Hard 16 vs 10, Hard 11 vs Ace)
-
- What is a blackjack basic strategy chart?
- How do I read the chart fast?
- What does hard vs soft mean?
- Why does basic strategy sometimes lose?
- Does the chart change with table rules?
- Do I need to memorize the chart?
- When should I surrender?
- Should I ever take insurance?
- What is the best app or tool to practice?
-
-
Reload Bonus Explained: What It Is and When It’s Worth Claiming
6 months ago -
Online Casino Licensing Explained: Authorities, Licenses & How to Check One
8 months ago -
Best Live Dealer Casinos: Where to Play Live Blackjack, Roulette & More
8 months ago -
Best Online Casinos for High Rollers: VIP Perks, High Limits & Exclusive Bonuses
8 months ago -
Fast Payout Online Casinos: Best Sites for Quick Withdrawals
8 months ago
-
Online Casino Customer Support: What to Look For (Live Chat, Email, Response Times)
8 months ago -
Sign Up for an Online Casino: Create an Account in Minutes
8 months ago -
Online Casino Payment Safety Tips: How to Deposit and Withdraw Securely
8 months ago -
What to Do If an Online Casino Won’t Pay Out: Step-by-Step Actions
8 months ago -
How to File a Complaint Against an Online Casino (Plus ADR Explained)
8 months ago