Blackjack Basic Strategy Chart: How to Use It to Lower the House Edge

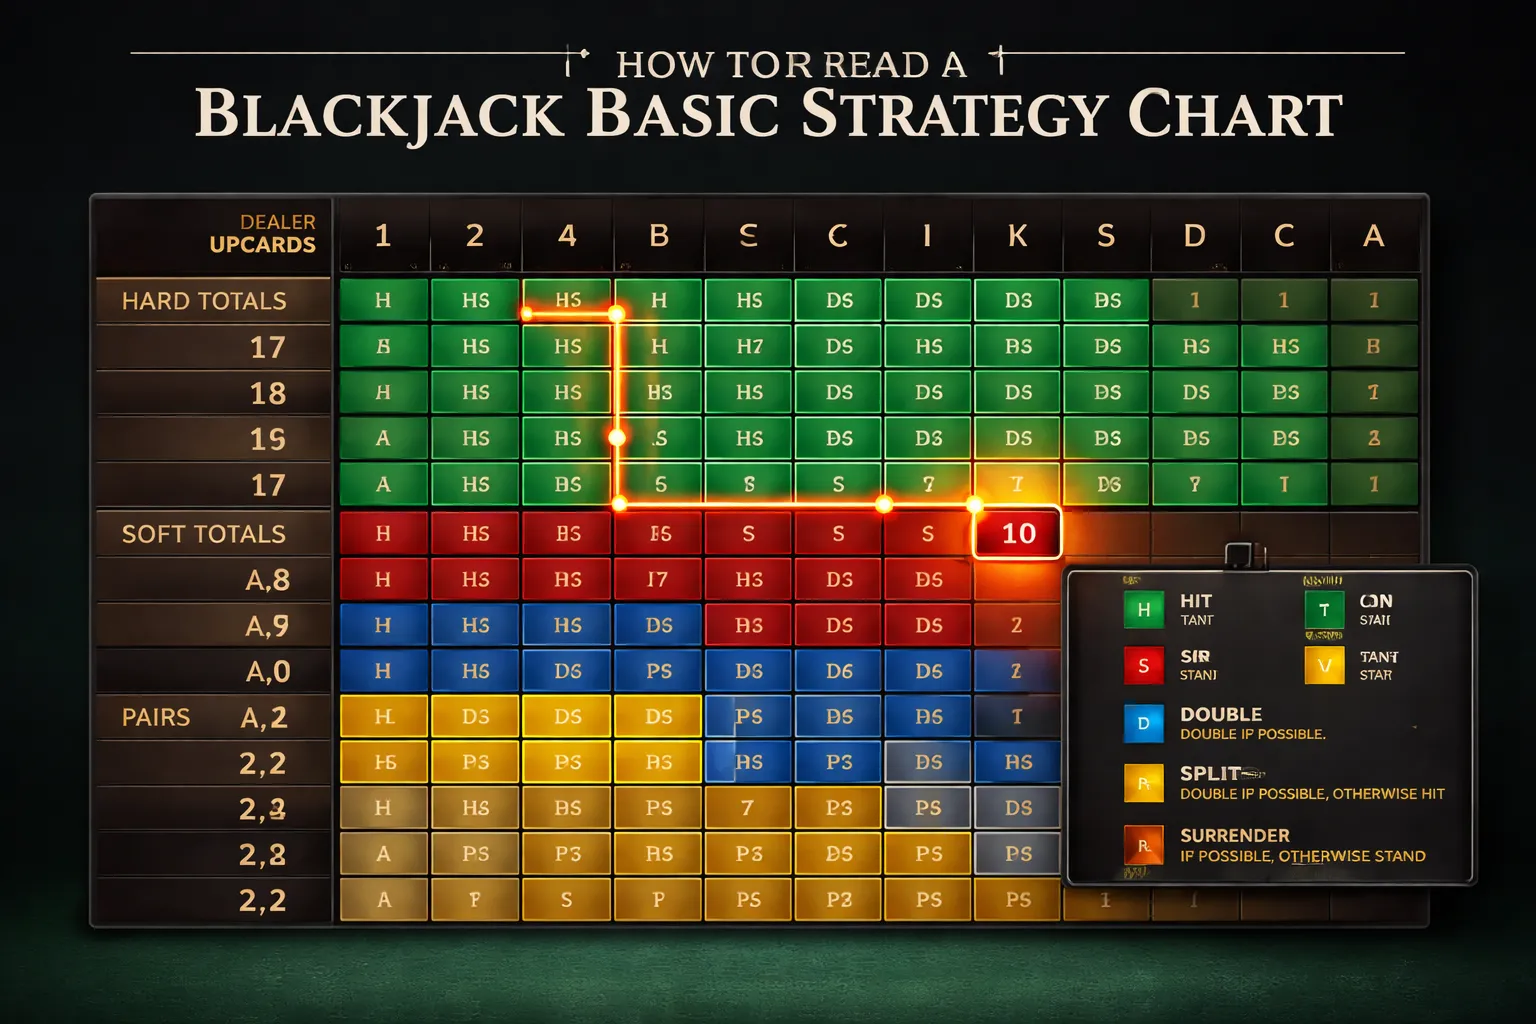
Blackjack basic strategy is a set of fixed plays for every hand you can get. A basic strategy chart shows those plays in one grid. You match your total and the dealer upcard, then follow the action shown.
This article shows you how to read the chart fast, including hard totals, soft totals, and pairs. You will learn what the symbols mean, how table rules change the correct play, and how to avoid common chart mistakes. You will also see why using the right chart matters, since rule sets like dealer hits or stands on soft 17 can change key decisions.
Used correctly, basic strategy cuts the house edge to a low level compared to guessing. It does not guarantee profit, it reduces costly errors one hand at a time.
Key Takeaways
- In het kort: Read your hand on the left, read the dealer upcard on top, then follow the symbol for the correct move.
- Use a chart that matches the table rules, especially S17 vs H17, number of decks, double rules, and whether you can double after split.
- Basic strategy lowers the house edge versus random play, but it does not guarantee profit.
- Hard totals, soft totals, and pairs each use different rows. Do not mix them.
- One wrong symbol can flip the best play. Check A-2 through A-7 hands and close split decisions, they change often by rule set.
- Memorize the highest value decisions first, then use the chart to confirm the rest.
- If you need a refresher on table flow and payouts, use this online blackjack guide.
What a Blackjack Basic Strategy Chart Is (and What It Isn’t)
Definition, a chart of best EV plays
A blackjack basic strategy chart is a decision grid. It tells you the best move for your exact hand against the dealer upcard.
“Best” means highest expected value, EV. EV is your average result over many hands, measured in money. The chart picks the play that loses the least, or wins the most, for that spot.
Basic strategy assumes no special information about the next cards. It uses the math of the rules, the deck count, and the dealer stand or hit rules.
What it isn’t, no prediction and no guarantee
The chart does not predict the next card. It does not “feel” streaks. It does not change because you just won or lost.
It also does not guarantee profit. It lowers mistakes. You still face negative EV in most rule sets, you just make it smaller.
Basic strategy vs card counting vs betting systems
- Basic strategy: fixed plays based on your hand and the dealer upcard. Same spot, same move.
- Card counting: tracks remaining deck composition. It can change some plays and it mainly changes your bet size when you have an edge.
- Betting systems: change wagers after wins or losses. They do not change the math of the cards. They do not reduce the house edge.
What “house edge” means in real dollars
House edge is your average loss per dollar wagered, over the long run.
Example math. If the house edge is 0.50% and you wager $25 per hand for 100 hands, your total action is about $2,500. Your expected loss is about $12.50.
If your mistakes push the edge to 2.00% under the same action, your expected loss rises to about $50.00. That gap is what the chart saves.
If you want the rule basics that drive those numbers, use this online blackjack guide.
How the Chart Is Built: The Math Behind the Moves
Why Dealer Rules Shape Optimal Play
The chart starts with the dealer. The dealer plays by forced rules. You react to that fixed behavior.
- Dealer must hit to 17 (or hit soft 17 in some games). This changes how often the dealer improves weak hands.
- Dealer cannot stop early. If the dealer has 12 to 16, they must keep drawing. That creates dealer bust chances you can exploit by standing more.
- Dealer stands on 17 in S17 games. That lowers dealer improvement versus H17, so you hit and double a little less often.
That is why strategy charts come in versions like S17 vs H17, single deck vs multi deck, and with or without surrender. Change the dealer rule set, change the math, change the move.
Outcome Probabilities: Bust Rates, Standing Equity, and Doubling Value
Every chart cell comes from expected value. The goal is simple. Pick the move with the best long-run return.
- Player bust risk. When you hit, you might bust. The chart weighs your bust chance against the value of improving your hand.
- Dealer bust rates by upcard. Dealer 2 through 6 are the main bust cards. Dealer 7 through A are the main “make a hand” cards.
- Standing equity. When you stand, you lock your total and let the dealer finish. The chart estimates your win, loss, and push rates from that point.
- Doubling value. Doubling is not “hit but bigger.” It is “take one card, then stop, for two units.” The chart uses doubling when one extra card has high upside and your bust risk stays controlled.
- Splitting value. Splitting can turn one weak or capped hand into two hands with better win rates. The chart compares the total EV of two hands against playing the pair as a normal hand.
Example logic. You stand more versus dealer 4 to 6 because the dealer will bust often enough to make your marginal totals profitable. You hit more versus dealer 9, 10, and A because the dealer will finish strong, so standing with a weak total loses too often.
If you want a move-by-move breakdown of what the chart tells you to do, use this blackjack basic strategy chart explained.
Why the Same Total Plays Differently (Hard vs Soft vs Pairs)
The chart treats hands by composition, not just total. Composition changes your risk and your ceiling.
- Hard totals. No ace counted as 11. Example, hard 16. If you hit, many cards bust you. The chart stands more when dealer bust chance is high, and hits more when the dealer is likely to make 17 to 21.
- Soft totals. An ace counts as 11, so you have a safety buffer. Example, A-6 is soft 17. You can hit without busting on many cards. That makes hitting and doubling more attractive than with the same number as a hard total.
- Pairs. Two equal ranks give you a choice: keep the total or split into two starts. Example, 8-8 is 16, but splitting avoids being stuck with a fragile hard 16. Example, 10-10 is 20, splitting usually turns a strong hand into two weaker ones.
This is why the chart lists hard hands, then soft hands, then pairs. The best move depends on how the next card changes your hand, and whether the ace can shift from 11 to 1.
Before You Use a Chart: Identify Your Blackjack Ruleset
Before You Use a Chart: Identify Your Blackjack Ruleset
A basic strategy chart only works when it matches your table rules. Casinos change rules to shift the house edge. Small rule changes can flip a hit into a stand, or a double into a hit. Check the felt, the placard, or the game info screen before you start.
Number of Decks, Single Deck vs. 6 to 8 Deck Shoes
Deck count changes card removal effects. Fewer decks make each exposed card matter more. That shifts the best play in some close spots.
- Single deck: More strategy deviations. Some doubles and stands become stronger because your exact odds move faster with each card seen.
- 6 to 8 decks: Fewer deviations. Most charts you find online assume 6 decks because it is the most common shoe game.
Do not use a single deck chart on a 6 deck table. Do not use a 6 deck chart on double deck. You will lose value on borderline hands.
Dealer Soft 17 Rule, S17 vs. H17
Soft 17 means A-6. Under S17, the dealer stands. Under H17, the dealer hits. H17 helps the dealer and raises the house edge.
- S17: You can stand more often in marginal spots because the dealer stops on more weak totals.
- H17: You double less and hit more in some soft hand cases because the dealer improves more often.
Pick the chart that matches S17 or H17. This is one of the most common reasons players use the wrong grid.
Doubling Rules, DA2, 9 to 11 Only, and DAS
Doubling rules change the value of aggressive plays. When you can double more hands, your chart will tell you to double more often.
- Double any two cards (DA2): Best for you. You gain doubles on hands like soft totals that often need one strong card.
- Double 9 to 11 only: Tighter. Your chart replaces several doubles with hits.
- Double after split (DAS): Big upgrade. It makes splitting more profitable because you can still press an edge after you split.
If the table does not allow DAS, some pair splits drop in value. If the table allows DA2 and DAS, you will see more doubles in the soft hand section.
Surrender Options, Late vs. Early
Surrender lets you forfeit half your bet and end the hand. It only matters if the game offers it. When it exists, it changes a small set of hard total decisions.
- Late surrender (LS): Dealer checks for blackjack first in American games. If no blackjack, you can surrender. This is the common version.
- Early surrender (ES): You can surrender before the dealer checks for blackjack. This is rare and stronger for you.
If your chart includes surrender but your table does not, you must replace those plays, usually with hit or stand based on the same ruleset. If your table offers surrender and your chart does not, you miss some of the lowest EV hands where surrender saves money.
European vs. American Dealing, Hole Card and No-Hole-Card
American blackjack usually deals a dealer hole card and checks for blackjack right away. European blackjack often uses no-hole-card rules. The dealer takes the second card only after you finish your hand.
- American hole card game: You lose doubles and splits only when the dealer already has blackjack, and you usually learn that before you commit extra money.
- European no-hole-card game: You can double or split, then lose the extra money if the dealer later reveals blackjack. This risk changes optimal play on some doubles and splits against strong up cards.
Use a chart built for your dealing method. A standard American shoe chart can overstate doubles and splits in no-hole-card games.
Once you lock in decks, S17 or H17, doubling limits, DAS, surrender, and dealing style, you can pick the correct chart and follow it without second-guessing.
How to Read a Blackjack Basic Strategy Chart Correctly
Row and Column Logic
A blackjack basic strategy chart works like a grid.
- Find your hand on the left side.
- Find the dealer upcard on the top row.
- Match the row and column. Play the action shown in the cell.
Most charts group hands in this order: hard totals, soft totals, then pairs. Use the correct section. The same number can appear in different sections and require a different play.
Hard Totals: What “Hard” Means and Common Traps
A hard total has no Ace counted as 11. You either have no Ace, or your Ace must count as 1 to avoid busting.
- Example: A,6,10 is hard 17. The Ace cannot count as 11.
- Example: 10,6 is hard 16.
Common traps that break the chart.
- Misclassifying A hands. A,6 is soft 17, not hard 17.
- Ignoring composition. Charts assume totals, not card history. Do not change the play because “I have three cards.”
- Forgetting double limits. Some charts assume double on any two cards. If your game only allows double on 9 to 11, you must follow the chart made for that rule set.
Soft Totals: Why an Ace Changes Everything
A soft total includes an Ace counted as 11. You have flexibility. You can take a hit without the same bust risk as a hard hand.
- Example: A,6 is soft 17. One hit cannot bust you.
- Example: A,6,10 becomes hard 17 after the hit. The Ace drops to 1.
This is why charts push more aggression with soft hands. You often double soft totals against weak dealer upcards because you can improve without busting as often.
Pairs: When Splitting Is Mandatory vs. Optional
Pairs use a separate section because splitting changes the hand type and the number of hands you play.
- Mandatory in basic strategy. Always split A,A and 8,8 in standard charts. You gain more than you lose, even against strong upcards.
- Never split in basic strategy. Never split 10,10 and usually never split 5,5. You play 10,10 as 20. You play 5,5 as a 10 and often double in the right spots.
- Optional depends on rules. Some splits change with DAS, resplit limits, and surrender. Use a chart that matches your rules.
After you split, you stop using the pair row. You switch to the hard or soft section for each new hand, unless you draw another pair and your rules allow resplitting.
Legend Decoding and Casino Variations
Charts use short codes. Read them the same way every time.
- H, Hit.
- S, Stand.
- D, Double if allowed, otherwise hit.
- Ds, Double if allowed, otherwise stand.
- P, Split.
- Rh, Surrender if allowed, otherwise hit.
- Rs, Surrender if allowed, otherwise stand.
These codes assume your game offers the option shown. If your table has no surrender, treat Rh and Rs as the fallback action in the code. If doubling is restricted, treat D and Ds as the fallback action unless you use a chart built for that restriction.
If you still need to verify what your table allows, use this online blackjack rules guide before you lock in a chart.
Step-by-Step: Using the Chart During Real Play
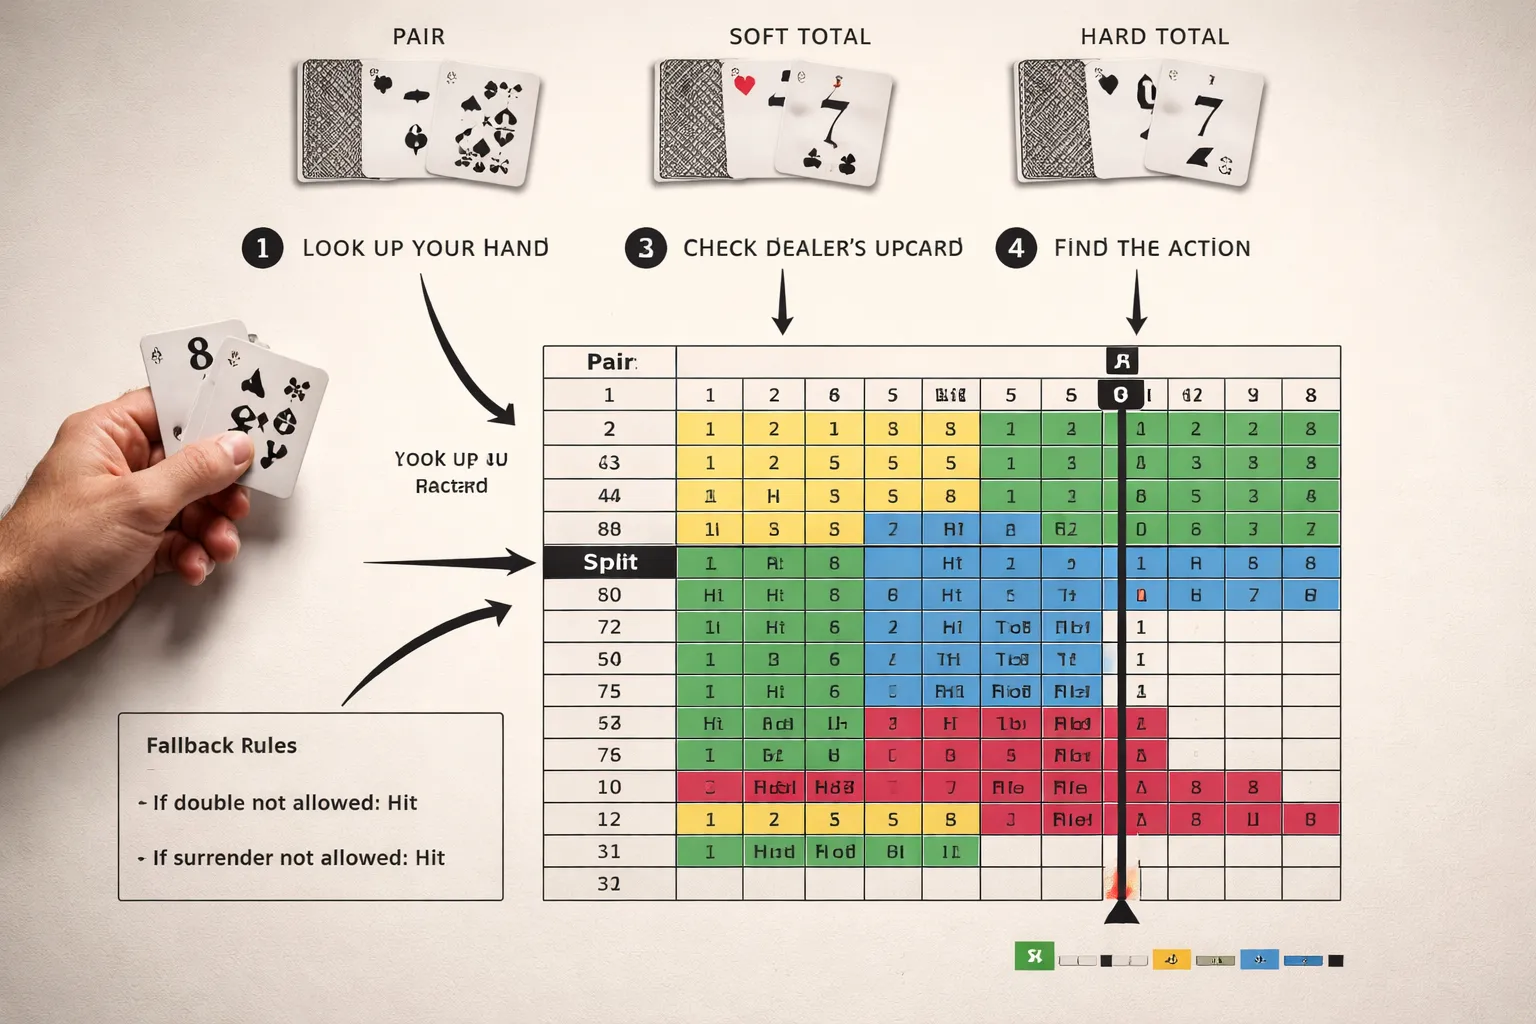
Fast workflow at the table, classify your hand in under 2 seconds
- Step 1, read the dealer upcard. Lock it in first. That is your column.
- Step 2, classify your hand. Use one of three buckets.
- Pair: two cards with the same rank, like 8-8. Go to the pair section.
- Soft total: any hand with an Ace counted as 11, like A-6. Go to soft totals.
- Hard total: everything else, like 10-6 or A-6-9. Go to hard totals.
- Step 3, find the row, then cross with the dealer column. Read the code. Act.
- Step 4, stop thinking once you have the move. Do not re-run the hand in your head.
Speed tip: if you see a pair, decide split or no split first. Many player errors come from treating a pair as a hard total.
Tie-breakers when rules restrict a move
Charts assume the option exists. When your table blocks a move, use a fixed fallback order. Use the one your chart notes. If it does not, use this standard order.
- Doubling not allowed: take the non-double action the chart implies. In most charts that means Hit instead of Double for totals that want Double, and Stand instead of Double for totals that want Double-Stand. If your chart uses D and Ds, follow its fallback note.
- Double after split not allowed (no DAS): still follow split rules, then after the split treat any Double result as the chart fallback, usually Hit.
- Surrender not offered: treat Rh as Hit and Rs as Stand.
- Resplit limits: split when the chart says split, until the table stops you. Then play the hand as a hard or soft total, based on the cards you now hold.
- No hole card or European no-peek: keep using the same chart, but avoid side bets and keep your stakes consistent. Dealer blackjack can wipe doubles and splits depending on rules.
Rule control tip: do not mix charts. Use one chart that matches your exact ruleset, deck count, and H17 or S17.
What to do when you misread your hand, quick correction process
- Catch it before you act: stop. Reclassify in this order, Pair, Soft, Hard.
- Confirm the dealer upcard: many misplays come from glancing at the wrong seat or side bet layout.
- Restart the lookup: row first, then column. Do not try to patch the old decision.
- If you already acted: accept it and move on. Do not chase losses. Do not change bet size to “fix” the mistake.
Common correction: A-7 is a soft 18, not hard 8. 8-8 is a pair, not hard 16.
Live dealer and online UX tips, multi-hand, autoplay, speed mode
- Use a chart overlay or a second screen. Keep it static. Scrolling costs time.
- Turn off speed mode until your lookup is automatic. Speed mode forces rushed errors.
- Avoid autoplay while learning. Autoplay can lock in a default action before you check the chart.
- Multi-hand play: start with one hand. Add a second only when you can classify and lookup each hand fast. More hands raise your error rate.
- Use the repeat pattern: dealer upcard stays the same for all your hands, so you only change the player row each time.
- Mind table UI labels: some apps show “Double” only on the first two cards. Some hide “Surrender” in a menu.
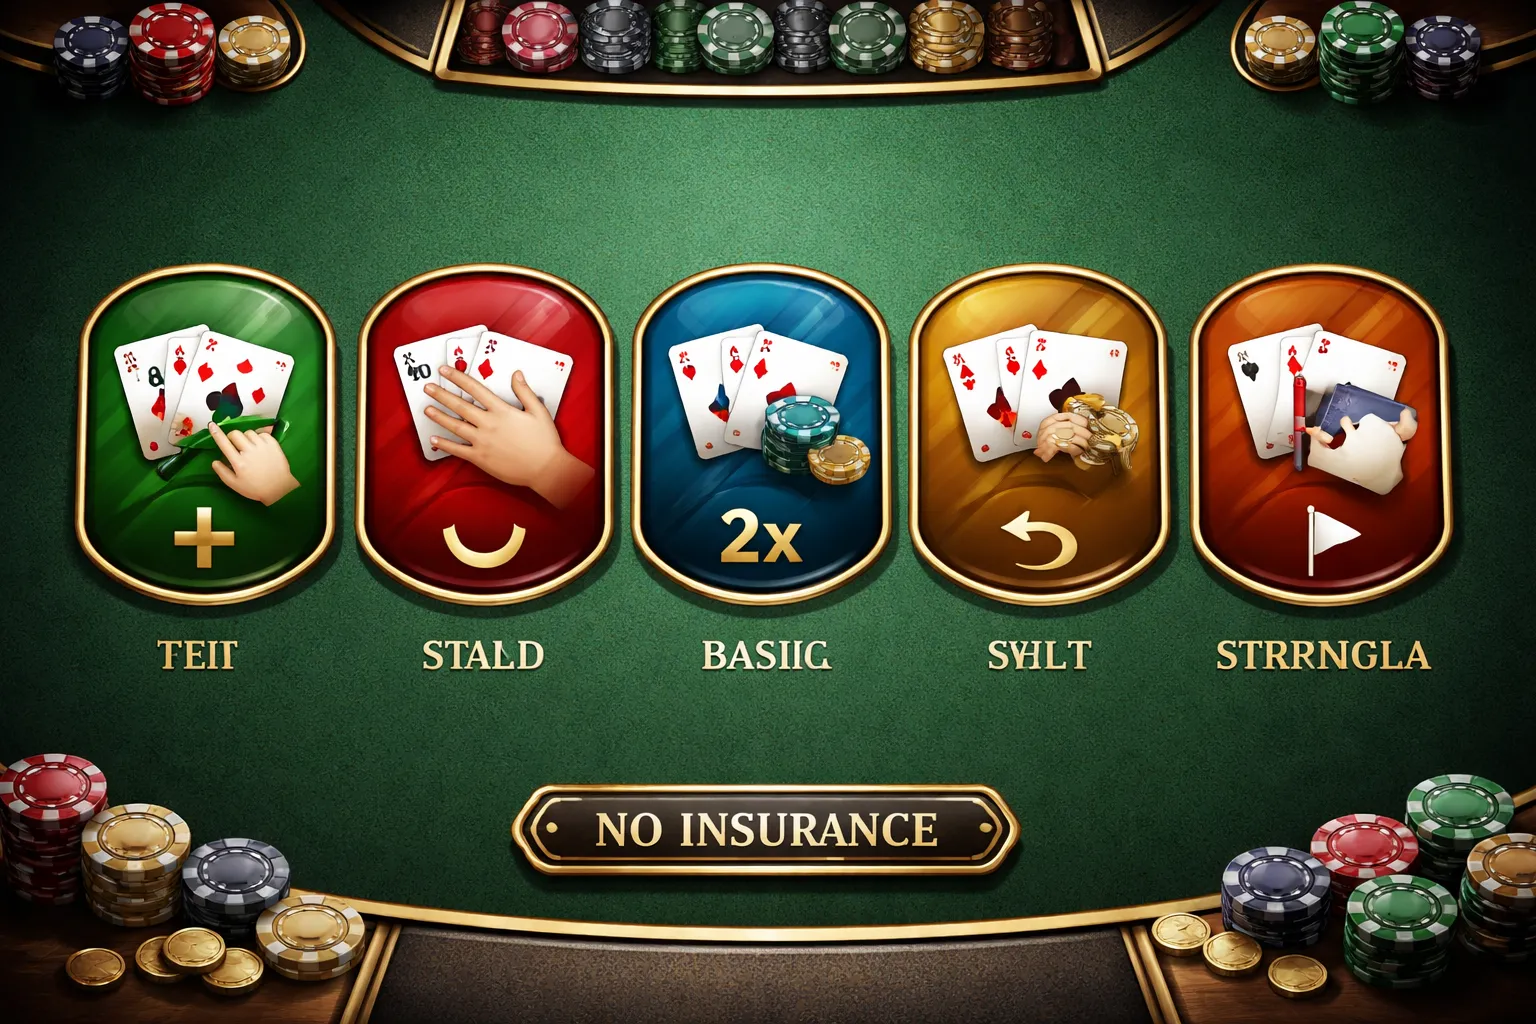
Core Decisions Explained: Hit, Stand, Double, Split, Surrender
Hit and Stand, win the borderline totals
Your chart mostly protects you on the ugly range, hard 12 to 16. These hands lose often. Your job is to lose the least.
- Hard 12, you usually stand vs dealer 4 to 6. You usually hit vs 2, 3, 7 through A. 12 is a trap because one hit often breaks, but standing vs strong dealer cards bleeds EV.
- Hard 13 to 16, you usually stand vs dealer 2 to 6. You usually hit vs 7 through A. The reason is simple, vs 2 to 6 you win more by letting the dealer bust, vs 7 through A you must improve.
- Hard 17+, you stand. Your bust risk on a hit is too high, and your hand already beats many dealer outcomes.
- Soft hands, you hit more. A soft total has an ace that can drop from 11 to 1, so you can take cards with less bust risk. The chart will often have you hit or double soft 13 to soft 18 depending on the dealer upcard.
Doubling down, when more variance raises EV
Doubling increases your bet when you have an edge on the next card. You trade higher variance for higher expected value.
- Double hard 11 in most rule sets, because any 10 value makes 21 and many other draws still land strong totals.
- Double hard 10 when the dealer shows a weaker upcard, often 2 through 9. You want the dealer to struggle while you improve.
- Double hard 9 vs dealer 3 to 6 in many charts. Your hand improves often, and the dealer bust rate stays high.
- Double soft hands when the chart says so, because you can draw to strong totals without busting. Soft 17 and soft 18 are common doubles vs the right dealer cards.
- Do not force doubles. If your table only allows doubling on 9 to 11, or only on the first two cards, follow the chart for that rule set. If you miss a double option, you must switch to the non double fallback action, usually hit or stand.
Splitting pairs, why A,A and 8,8 are special
Splitting converts one weak hand into two better hands, when the math says the combined EV rises.
- Always split A,A. One ace plus one card has a high chance to make 19 to 21. Playing A,A as 12 is low EV. Many games limit you to one card per split ace, the split still wins long term.
- Always split 8,8. Hard 16 is one of the worst totals in blackjack. Splitting gives you two starts at 8, which can build into 18 and up. Even vs a dealer 10, the split usually loses less than standing or hitting 16.
- Do not split 10,10 in basic strategy. 20 already wins a lot. You break a strong hand into two hands that can easily land in the 13 to 19 range.
- Do not split 5,5 in most charts. Treat it as hard 10 and double vs the right dealer upcards.
- Split 2,2 and 3,3 mainly vs dealer 4 to 7 depending on the chart. These are improvement splits, you want the dealer to show weakness.
- Split 6,6 and 7,7 vs weaker dealer cards. Your chart will tighten or loosen this based on DAS rules, because double after split makes splitting more valuable.
- 9,9 is a rule driven pair. Many charts split vs 2 to 6 and 8 to 9, but stand vs 7, 10, A. Follow your exact chart, this one changes across variants.
Surrender, the best EV “save” spots
Surrender cuts your loss to half a bet. You use it when playing the hand out loses more than 0.5 units on average.
- Top surrender spot, hard 16 vs dealer 9, 10, or A in many late surrender games. 16 is bad, and the dealer’s upcard is strong.
- Common surrender, hard 15 vs dealer 10. Your bust risk on hits is high, and standing loses often.
- Avoid surrender vs dealer 2 through 6 on most totals. The dealer bust rate is high, so you usually gain more by playing the hand.
- Know the type. Late surrender works after the dealer checks for blackjack. Early surrender works before the check and is stronger, but rare. Use the chart that matches the table, because surrender decisions shift.
- If surrender is missing, use the chart’s fallback, usually hit or stand. Many apps hide surrender, so confirm before you start.
Insurance and even money, why basic strategy says no
Insurance is a side bet on the dealer having a 10 value under an ace. It pays 2 to 1, but the true odds usually do not justify it.
- Basic strategy says no insurance because, in a typical multi deck game, the chance of a 10 value in the hole is below the break even point for that payout.
- Even money is insurance in disguise when you have blackjack. You lock a 1 to 1 payout instead of risking a push vs dealer blackjack. The math is the same bet. Basic strategy still says no.
- Exception comes from card counting, not basic strategy. Without a high true count, taking insurance burns EV.
- If you need a rules refresher, see our online blackjack rules quick start guide.
Rule-Specific Charts: Which One You Actually Need
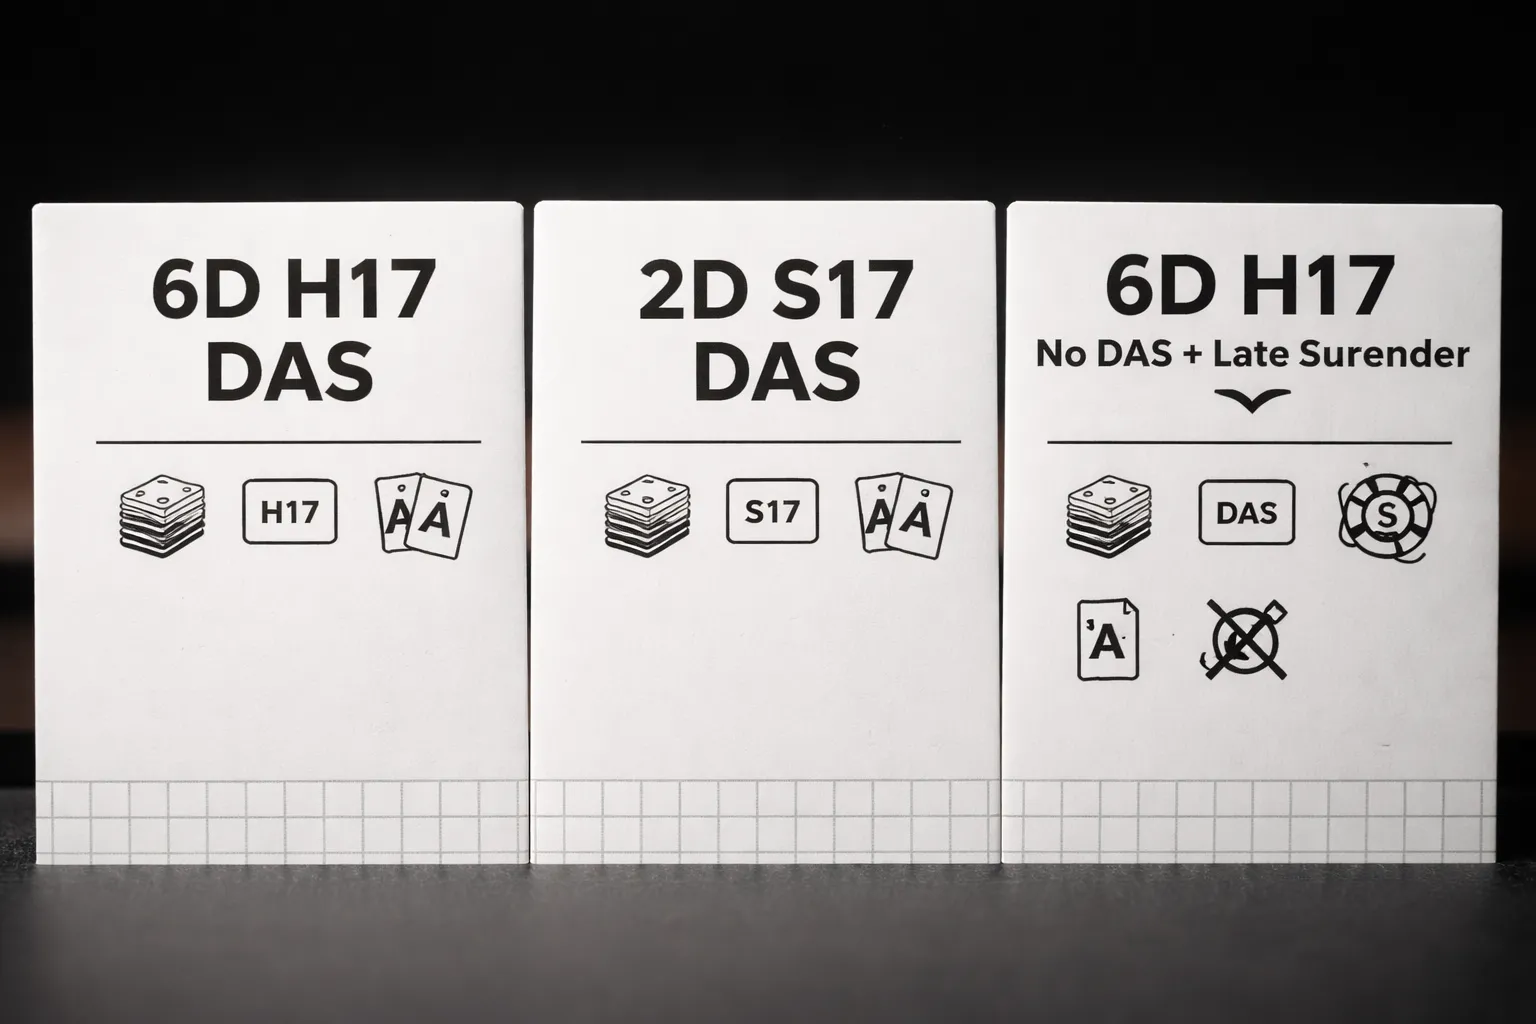
6 to 8 Decks, H17, DAS. The Chart Most Players Need
Most casino shoes run 6 to 8 decks. Many use H17, dealer hits soft 17. Many allow DAS, double after split. This rule set is the default for your chart choice.
If you play a shoe game and you are not sure, start with a 6D H17 DAS chart. It will usually land closer than a single deck chart, and it avoids the most common mismatch.
- Decks: 6D and 8D charts play very close. Use one shoe chart for both.
- H17 vs S17: H17 changes several close doubles and soft hand plays. Do not mix these charts.
- DAS: DAS changes split hands. If your table allows it, use the DAS chart.
2 Decks vs 1 Deck. What Changes Most
As decks drop, you gain more from doubles and some splits. The chart shifts on the margin. The biggest differences show up in doubling and splitting decisions.
- Doubling gets more aggressive: Some borderline doubles in shoe games turn into clear doubles in double deck, and even more so in single deck.
- Splitting gets tighter or looser by matchup: A few pairs flip between split and no split as deck count changes, because removal effects matter more.
- Soft hands shift: Soft doubles and soft hits versus mid up cards change more often than hard totals.
If you play double deck, use a 2D chart. If you play single deck, use a 1D chart. Do not “round up” deck count when the game is not a shoe.
Surrender Charts. Late Surrender Changes the Table
Late surrender gives you a new option on a small set of hard totals. It does not rewrite the whole chart. It mainly replaces some hits and some doubles with surrender.
- Hard 15 and 16 vs strong dealer cards: These are the main surrender spots.
- Hard 17 vs Ace: Often becomes a surrender in many rule sets.
- Some borderline doubles: In a few cases, surrender beats a weak double or a bad hit.
If the table offers late surrender, use a chart that includes it. If the table has no surrender, ignore every “R” you see on other charts.
No DAS or Limited Doubling. Adjust When Options Shrink
Rules that remove options force conservative play. Your chart must match those limits, or you will pick actions you cannot take, and you will misplay the fallback.
- No DAS: After you split, you lose many double opportunities. The chart changes on split hands like 2s, 3s, 6s, 7s, and 9s in specific matchups.
- Double limits: If the table only allows double on 9 to 11, or 10 to 11, you must replace some doubles with hits or stands.
- No re-split rules: If you cannot re-split aces or other pairs, splitting value drops in a few edge cases.
When you face a rule you cannot find on your chart, use this fallback. If your chart says double and you cannot, hit. If it says split and you cannot, play the hand as a hard or soft total.
If you need to confirm the table rules before you choose a chart, use our online blackjack guide.
Printable vs Mobile-Friendly Formats. Pick the Right Layout
Format affects how fast you can act. Speed matters because hesitation leads to errors.
- Printable: Best for home practice. Use a full chart with hard totals, soft totals, and pairs on one page.
- Mobile-friendly: Best for quick checks. Use a tall layout with big labels, or separate tabs for hard, soft, and pairs.
- Color codes: Use them only if they stay consistent across charts. If colors change between sources, you will misread actions.
Keep one chart per rule set. Label it in the filename. Example, 6D H17 DAS LS. That stops mix-ups.
Common Mistakes That Increase the House Edge
Standing on 16 vs. 10 (and other emotionally hard calls)
Most extra house edge comes from a few painful hands. You remember them, so you repeat the mistake.
- Hard 16 vs 10: Many players stand to avoid busting. Basic strategy often tells you to hit, or surrender if the rules allow it. Standing turns a bad hand into a worse one because your win rate stays low and you give up the chance to improve.
- Hard 15 vs 10: Same pattern. Players stand. Strategy often prefers surrender, or hit when surrender is not offered.
- 12 vs 2 or 3: Many players stand because 12 “feels safe.” Many charts tell you to hit, depending on the rule set. That one-square difference matters over volume.
- Stiff totals vs dealer 7 to A: If you keep standing on 12 to 16 against strong upcards, you bleed edge. Those dealer upcards produce more made hands, you must improve or exit the hand.
Misplaying soft hands (soft 18 vs 9, 10, A)
Soft hands look strong because they cannot bust on one hit. Players still freeze and stand too often.
- Soft 18 (A,7) vs 9, 10, A: Many players stand every time. Most charts tell you to hit, or double in some spots, because standing leaves you behind too often.
- Soft 17 (A,6) and soft 16 (A,5): Players hit when they should double. A double captures value when the dealer is weak and you have a high chance to improve to 18 to 21 with one card.
- Soft 19 (A,8): Players double when they should stand. Doubling here usually adds risk without enough upside, except in specific rule sets and upcards.
- Rule mismatch problem: Soft hand doubles change a lot between H17 and S17, and with DAS. If you use the wrong chart, soft totals punish you fast.
Over-splitting 10s and under-splitting 2s and 3s in the right spots
Pair decisions drive big swings in expected value. Most mistakes come from ego and fear.
- Splitting 10s: It looks powerful when the dealer shows a 5 or 6. It is still usually a mistake. You break a made 20 into two weaker hands, and you give the dealer more chances to beat you.
- Failing to split 2s and 3s vs 4 to 7: Players avoid “small splits.” In many common rule sets, splitting creates two hands that can improve, and it lines up well against dealer weak and medium upcards. If DAS is allowed, the value improves further.
- Failing to split 6s vs 2 to 6: Players stand or hit and miss the higher EV play. This error shows up often because the hand feels fragile.
- Auto-splitting without checking the upcard: Splits depend on the dealer upcard. Use the chart, do not use a rule like “always split” or “never split.”
Ignoring dealer upcard strength (2 to 6 vs 7 to A)
Your best move changes because the dealer bust rate changes. Weak upcards mean you can stand more. Strong upcards mean you must improve.
- Dealer 2 to 6: Many players get aggressive and start hitting totals that should stand. You win many of these hands by letting the dealer break.
- Dealer 7 to A: Many players get defensive and start standing on stiff totals. That gives up too much equity. You need more made hands because the dealer will make 17+ often.
- Misreading the “borderline” upcards: The 2 and 3 are not the same as the 5 and 6. The 7 is a major line. Treat them differently, like the chart does.
Using the wrong chart for the table rules
This is the easiest way to add house edge without noticing. One wrong rule can flip key cells.
- H17 vs S17: If the dealer hits soft 17, you usually double less and hit more in several soft hand spots. Using an S17 chart on an H17 game, or the reverse, creates steady EV leaks.
- DAS vs no DAS: Doubling after split changes many pair plays. If you ignore it, you will split or hit in the wrong places.
- Surrender vs no surrender: Late surrender changes tough hands like 15 vs 10 and 16 vs 9 to A. If your chart assumes surrender and the table does not offer it, your decisions break.
- Deck count and penetration: Basic strategy shifts slightly by deck count. The big error is using a single-deck chart on a six-deck shoe, or the reverse.
- European vs American dealing: No-hole-card rules change the cost of doubles and splits against dealer 10 and A. Match the chart to the dealing procedure. For related rule differences across games, see online blackjack rules and side bets.
How Much Basic Strategy Lowers the House Edge (Realistic Expectations)
Typical house edge ranges (what to expect)
Basic strategy does not make blackjack a winning game by itself. It cuts your losses to the minimum the rules allow.
- Good shoe game: 6 to 8 decks, dealer stands on soft 17 (S17), double after split (DAS) allowed, late surrender available. Expect about 0.3% to 0.6% house edge with correct play.
- Common shoe game: 6 to 8 decks, dealer hits soft 17 (H17), DAS allowed, no surrender. Expect about 0.5% to 0.9%.
- Tighter rules: H17, no DAS, restricted doubling, or no resplit rules. Expect about 0.8% to 1.5%.
- Single or double deck with good rules: can land around 0.1% to 0.5%, but only if the table keeps player friendly rules and decent penetration.
- 6:5 blackjack payout: this is the big trap. Even with perfect play, expect roughly 1.4% to 2.0%+ house edge in many setups.
If you want a full rule breakdown and what each rule does to the edge, use this online blackjack guide.
EV vs variance (why you still lose sessions)
Basic strategy improves your expected value. It does not smooth your results.
- Expected value: the long run average. A 0.5% house edge means you lose about 0.5 units per 100 units wagered, on average.
- Variance: the short run swings. Blackjack has frequent doubles, splits, and 3:2 payouts. Your bankroll will move in chunks.
- What this means for you: you can play perfectly and still lose for hours. You can also win while making mistakes. The cards do not care.
Bankroll impact over 100, 1,000, 10,000 hands
The clean way to think about cost is expected loss per hand.
Formula: Expected loss = house edge × average bet × hands played.
| Hands played | At 0.5% edge, $10 average bet | At 1.5% edge, $10 average bet |
|---|---|---|
| 100 | $5 | $15 |
| 1,000 | $50 | $150 |
| 10,000 | $500 | $1,500 |
- What the table shows: basic strategy does not change your luck. It changes your leak rate.
- What it saves you: moving from 1.5% to 0.5% saves about $10 per 100 hands at a $10 average bet.
- What it does not do: it does not guarantee profit. You still need an actual player edge, like counting with good rules and penetration, to flip EV positive.
How to Memorize a Blackjack Basic Strategy Chart Faster
Chunking method: learn “always” rules first, then exceptions
Memorize the chart in layers. Start with rules that rarely change across common games.
- Always split A,A and 8,8.
- Never split 5,5 and 10,10. Treat 5,5 as a hard 10. Treat 10,10 as a stand most of the time.
- Always hit hard 8 or less.
- Always stand hard 17 or more.
- Always hit soft 17 or less.
- Soft 19 and soft 20 are stands most of the time.
Next, learn the exceptions in tight groups. These drive most of your errors.
- Hard 12: stand vs 4 to 6, hit vs 2 to 3 and 7 to A.
- Hard 13 to 16: stand vs 2 to 6, hit vs 7 to A.
- Hard 9: double vs 3 to 6, otherwise hit.
- Hard 10: double vs 2 to 9, hit vs 10 and A.
- Hard 11: double vs 2 to 10, vs A depends on rules.
- Soft 18: the swing hand. It changes action more than any other soft total.
- Pairs 2,2, 3,3, 6,6, 7,7, 9,9: learn each pair as its own mini chart.
Mnemonic anchors for hard totals, soft totals, and pairs
Use a few anchors that point you to the right row fast. Keep them rule based, not cute.
- Dealer 2 to 6 is a “bust zone”. Your default is to stand more on hard 12 to 16, and to double more when you have 9 to 11.
- Dealer 7 to A is a “pressure zone”. Your default is to hit more on hard 12 to 16.
- Hard totals anchor: 8 or less hit, 17 or more stand. Memorize 9 to 16 only.
- Soft totals anchor: soft hands want doubles. When you cannot double, you often hit. Soft 18 is the main exception you drill.
- Pairs anchor: A,A and 8,8 always split. 5,5 and 10,10 never split. Everything else depends on dealer strength.
Drills: flashcards, apps, and timed dealer-upcard practice
Drill speed, not reading skill. You want instant action from the hand and upcard.
- Flashcards: front shows your hand and dealer upcard, back shows the action. Shuffle. Do 50 to 100 reps per session.
- Apps: use a trainer that forces an answer, then shows the correct move and tracks error rate by hand type.
- Timed upcard drill: pick a dealer upcard and run every player hand that matters in order, hard 8 to 17, then soft 13 to 20, then pairs. Time yourself. Repeat for the next upcard.
- Error drill: when you miss, write the exact hand and upcard. Re-drill only your misses until you clear them twice in a row.
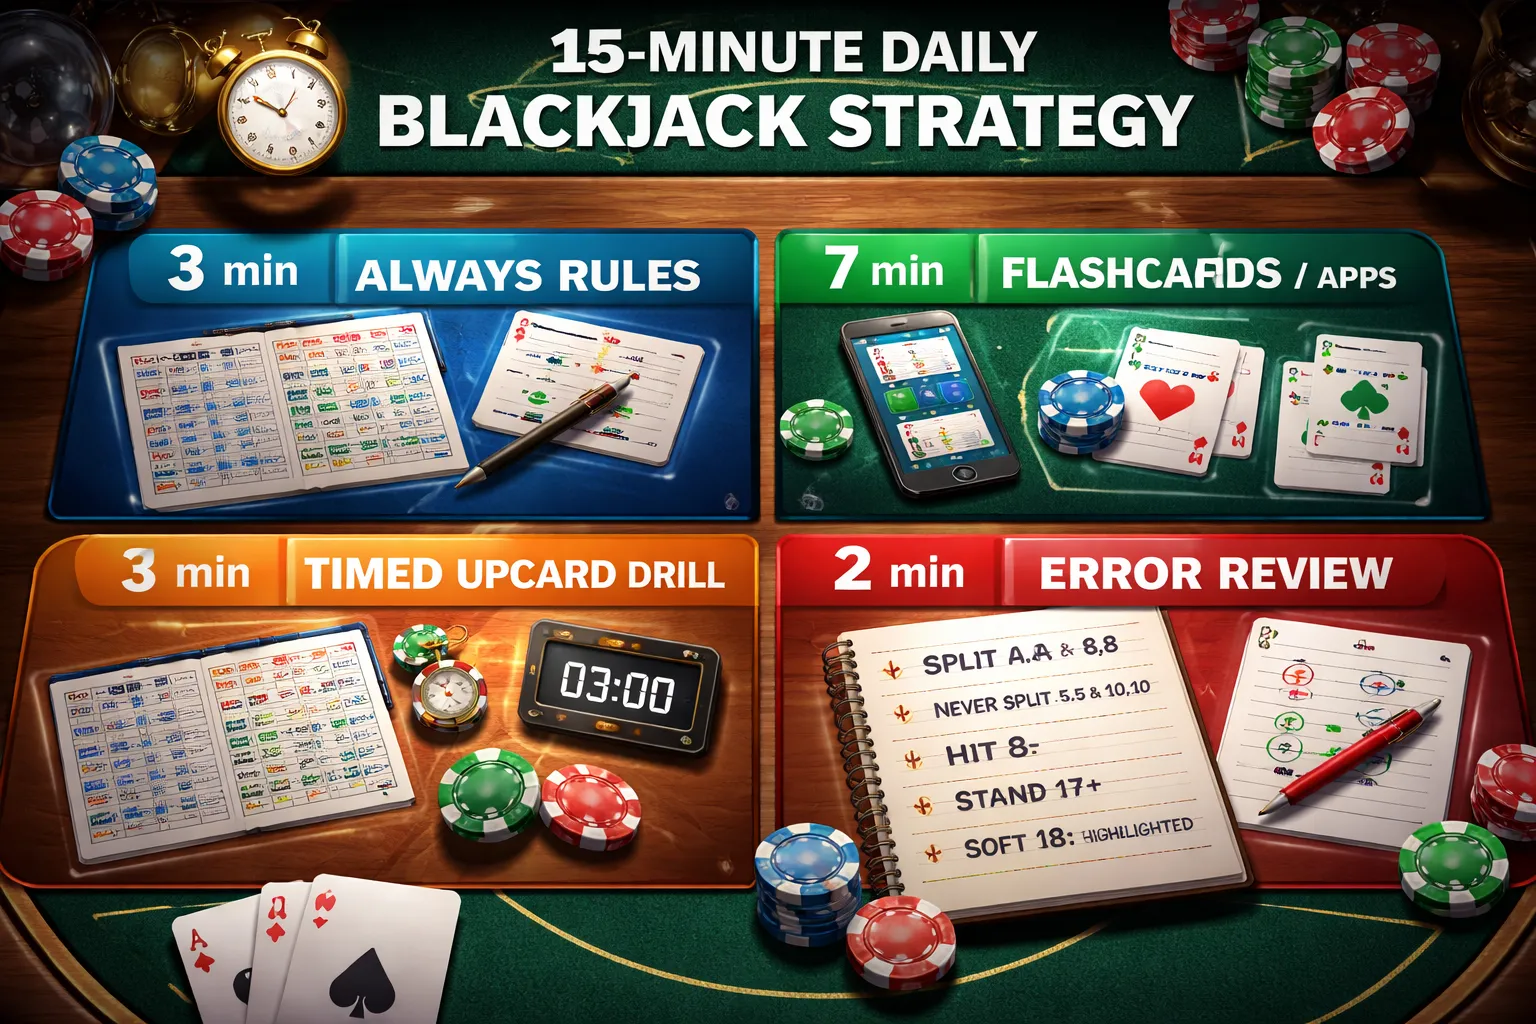
Practice plan: 15 minutes/day to reach near-automatic decisions
Keep the plan small so you do it daily. Volume beats long sessions.
- Minutes 1 to 3: review your “always” rules list.
- Minutes 4 to 10: flashcards or app trainer, focus on hard 12 to 16, soft 18, and pairs.
- Minutes 11 to 13: timed dealer-upcard drill for one upcard. Rotate upcards across days.
- Minutes 14 to 15: re-test your top 10 misses from the last session.
After 7 days, you should stop checking the chart on most hands. After 14 days, your remaining errors usually cluster in soft doubles and pair splits.
Self-testing: measuring accuracy and speed without guessing
Track two numbers. Accuracy and decision time. Do not guess. If you do not know, mark it as “unknown”.
- Accuracy target: 95% or higher on a 100-hand mixed quiz.
- Speed target: 2 seconds per decision on average, with no long pauses.
- Stop guessing rule: if you hesitate, say “unknown”, check the chart, then drill that exact spot 10 times.
- Split your score: track hard totals, soft totals, pairs separately. Fix the weakest category first.
If you play online, also learn how the game proves outcomes, see our guide to RNG and house edge.
Can You Use a Chart at the Table? Etiquette, Legality, and Casino Policies

Land-based casinos, what is allowed and what draws attention
Most casinos do not treat a basic strategy chart as cheating. It is public information. You can use it, but the casino controls table conduct.
- Generally allowed: a small printed card, a folded sheet, or a phone image if the pit allows phones at the table.
- Often restricted: using your phone at a live table, taking photos, recording video, or having an open app while cards are in play.
- What draws attention: long pauses, reading every hand, asking the dealer to wait, or holding up a full table.
- What gets you removed: arguing with staff, refusing to follow device rules, or ignoring “no phones” signs.
If a staff member asks you to stop using the chart, stop. Switch to memorized play, or move to a lower-stakes table while you practice.
Online blackjack, charts on a second screen or a printed sheet
Online play usually makes chart use easy. You control the pace, and you do not slow down a live table.
- RNG blackjack: use a second monitor, a phone next to you, or a printed sheet. Take your time, but avoid timing out.
- Live dealer blackjack: you can still use a chart, but you must act before the decision timer ends.
- Do not use prohibited tools: bots, auto-play scripts, or programs that interact with the game window. Sites can flag this.
If you are new to live dealer timing and controls, use our online blackjack quick start guide.
Player etiquette, keep the game moving
Your goal is correct decisions without stalling the table.
- Use the chart only when you need it. Do not “double-check” obvious hands.
- Keep the chart small and ready. Do not unfold large pages on the felt.
- Act within a normal rhythm. Aim for quick lookups, then signal your play.
- Do not coach other players unless they ask. Many players dislike advice.
- If the table is full and fast, step away and practice elsewhere.
Common myths and the reality
- Myth: “Charts are cheating.” Reality: Basic strategy is legal. It uses no hidden information.
- Myth: “Casinos will ban you for using basic strategy.” Reality: Casinos want fast play. They may stop phone use or slow behavior, not the strategy itself.
- Myth: “Using a chart changes the cards.” Reality: It only reduces your mistakes. It does not change outcomes.
- Myth: “Other players can ruin your odds.” Reality: Their choices can change short-term results, but they do not change the long-run house edge of the rules you play.
Beyond the Chart: Smart Add-Ons That Don’t Break Basic Strategy
Game selection checklist: rules, penetration, and table limits
Basic strategy lowers the house edge. The game rules decide how low it can go. Pick the best table before you play a hand.
- Decks: Fewer decks helps you. Single and double deck beat six and eight deck, all else equal.
- Dealer stands on soft 17 (S17): Prefer S17. Dealer hits soft 17 (H17) adds about 0.2% to the house edge versus S17.
- Blackjack payout: Only play 3:2. Avoid 6:5. A 6:5 payout can add about 1.4% to the house edge.
- Double rules: Prefer double on any two cards (DA2). Avoid “double 10 or 11 only.”
- Double after split (DAS): Prefer DAS. It cuts the house edge by roughly 0.1% to 0.2%.
- Re-splitting: Prefer re-split pairs. Re-splitting aces also helps when allowed.
- Surrender: Prefer late surrender (LS). It can cut the house edge by about 0.07%.
- Penetration: Deeper is better. More cards dealt before the shuffle makes counting more viable and reduces the impact of frequent shuffles.
- Table limits: Match your bankroll. Low minimums let you survive variance. High minimums force bigger swings and faster bustouts.
| Rule or condition | What to look for | Why it matters |
|---|---|---|
| Blackjack payout | 3:2 | Biggest single rule edge swing |
| Soft 17 | S17 | Lower dealer win rate; about 0.2% better than H17 |
| DAS | Yes | More profitable doubles after splits |
| Late surrender | Yes | Lets you cut losses in bad spots |
| Penetration | Deep shoe | Key for card counting; fewer resets |
Side bets: why they usually raise the house edge (when to skip)
Basic strategy applies to the main hand only. Side bets sit outside the chart. They almost always come with a higher house edge.
- They pay for entertainment, not value. Many common side bets carry house edges in the high single digits or worse.
- They add variance. You lose money in long dry spells, then hit an occasional payout that does not fix the math.
- They distract you. More decisions leads to more main-hand mistakes, which costs more than most players expect.
- Skip by default. If your goal is to lower the house edge, put that money into the main bet or do not bet it at all.
If you want to understand how specific side bets work and why casinos push them, use this guide on online blackjack rules and side bets.
Card counting connection: how basic strategy becomes the foundation
Card counting does not replace basic strategy. It sits on top of it.
- Step one: Play perfect basic strategy. If you miss chart decisions, counting does not save you.
- Step two: Track the count. The count estimates when the remaining cards favor you.
- Step three: Change your bet size when you have an edge. This matters more than small play changes.
- Step four: Use a short list of count-based deviations. You change a few key plays when the count reaches specific levels.
Most players fail at step one. They leak edge through basic errors, then chase it with advanced ideas.
When deviations matter (and why most players shouldn’t freestyle)
A deviation is a deliberate move away from the chart based on extra information. “Dealer looks weak” is not information. The count is information.
- Deviations matter when you can measure your edge. That means a real count, decent penetration, and stable rules.
- Most deviations have small value. The gain per hand is thin. You need high accuracy and a lot of hands for it to show up.
- Freestyling costs money. Random changes usually increase errors on common hands like 12 to 16 versus dealer 2 to 6.
- Use a fixed set if you use any. If you do not have indexes and practice, stick to the chart every hand.
Basic strategy already removes the biggest leaks. Your best “add-on” is choosing good rules and playing clean, fast, and consistent.
FAQ
What is a blackjack basic strategy chart?
A basic strategy chart tells you the best play for every hand against each dealer upcard. It assumes you play to minimize the house edge, not to chase streaks. Charts differ by rules, deck count, and whether the dealer hits or stands on soft 17.
How do you read the chart?
Find your hand on the left. Find the dealer upcard on the top. Follow the row and column to the action. Use hard totals, soft totals, and pairs in the right section. Treat A as ace. Apply the chart before you act.
Does basic strategy guarantee profit?
No. It lowers expected loss. Variance still drives short-term results. You can play perfectly and lose for hours. Over many hands, basic strategy mainly reduces your mistakes and shrinks the house edge compared to guessing.
How much does basic strategy lower the house edge?
In common shoe games, basic strategy often puts the house edge around 0.5 percent to 1.0 percent, depending on rules. Bad play can push your expected loss several percent higher. Rules matter as much as decisions.
What rules change the chart the most?
Dealer hits or stands on soft 17, doubling rules, and whether you can double after splitting change key hands. Surrender changes several hard totals versus strong dealer cards. Always match the chart to the table rules and deck count.
Should you memorize the chart or use a card?
Memorize it if you can. It speeds decisions and cuts errors. If the casino allows a strategy card, use one. Do not freestyle. Consistency matters more than speed. Wrong “memory shortcuts” cost more than checking.
What is the biggest mistake players make with charts?
They use the wrong chart. A single-deck chart on a six-deck H17 game gives bad doubles and splits. Another common mistake is overriding the chart on 12 to 16 versus dealer 2 to 6. That leaks money fast.
Do charts work for online blackjack and live dealer games?
Yes, if you match the rules. Live dealer games usually use 6 to 8 decks with specific double and split rules. Many RNG online tables vary rules by provider. Read the table help screen first. For formats, see Live Casino Guide.
When should you deviate from basic strategy?
Only when you use proven index plays tied to a real count, and you practice. Random deviations increase errors. If you do not track count and indexes, follow basic strategy every hand. The chart already captures most value.
Does basic strategy account for card counting?
No. Basic strategy assumes an average deck. Card counting changes the best play in specific spots. Those changes are small and situational. If you do not count accurately, you will add mistakes and lose more than you gain.
Can you use one chart for all blackjack games?
No. You need the right chart for deck count and rules. A “generic” chart can be close, but close still costs money over time. Keep one chart per common setup, like 6D H17 DAS, and 8D S17 DAS.
Conclusion
Conclusion
A basic strategy chart does one job. It cuts your mistakes to the minimum for a specific blackjack game.
Match the chart to the table. Deck count and key rules change the best play and your long-run cost.
Use the chart until you stop thinking. Then test yourself in short drills, 50 hands at a time. Track errors. Fix the ones you repeat.
Your best edge comes from clean execution. Play the right chart, every hand, with the same discipline.
For a quick refresher on chart symbols and hand groups, see our blackjack basic strategy chart explained.
-
Online Casino Fairness Explained: RNG, RTP, House Edge & Provably Fair
4 months ago -
How to Play Online Slots: Rules, Features & Beginner Tips
4 months ago -
Slot RTP Explained: What RTP Means and How to Use It
4 months ago -
How to Play Online Blackjack: Rules, Payouts & Quick Start Guide
4 months ago -
How Slot Jackpots Work: Progressive Jackpots Explained
4 months ago
-
- What is a blackjack basic strategy chart?
- How do you read the chart?
- Does basic strategy guarantee profit?
- How much does basic strategy lower the house edge?
- What rules change the chart the most?
- Should you memorize the chart or use a card?
- What is the biggest mistake players make with charts?
- Do charts work for online blackjack and live dealer games?
- When should you deviate from basic strategy?
- Does basic strategy account for card counting?
- Can you use one chart for all blackjack games?
-
Reload Bonus Explained: What It Is and When It’s Worth Claiming
1 month ago -
Online Casino Licensing Explained: Authorities, Licenses & How to Check One
3 months ago -
Best Live Dealer Casinos: Where to Play Live Blackjack, Roulette & More
3 months ago -
Best Online Casinos for High Rollers: VIP Perks, High Limits & Exclusive Bonuses
3 months ago -
Fast Payout Online Casinos: Best Sites for Quick Withdrawals
3 months ago
-
Online Casino Licensing Explained: Authorities, Licenses & How to Check One
3 months ago -
Are Online Casinos Legal? Complete Guide by State & Country
4 months ago -
Casino VIP & Loyalty Programs Explained: Points, Tiers, Rewards & Rakeback
4 months ago -
Online Casino Fairness Explained: RNG, RTP, House Edge & Provably Fair
4 months ago -
Free Spins Bonus Explained: How Free Spins Work at Online Casinos
4 months ago